Zoom
With Zoom, you can host audio and video calls and screen broadcasts with up to 100 participants and with up to 10,000 viewers. This is suitable not only for meetings, but especially for lectures and seminars, as Zoom lets you interact directly with students. In addition, students can also work with and among each other.
Furthermore, Zoom meetings can also be recorded, so you can also upload them to ILIAS after the meeting. We offer a fairly comprehensive explanation of each section of the program here, but we can't go into everything. In the following sections, we list the information that we consider relevant. Nevertheless, please have a look at the program yourself.
The RRZK points out important settings for data protection, you can find the current messages here. Individual settings may vary from these instructions due to specifications by the RRZK.
You can also find a FAQ from the RRZK about Zoom here.
Basic information

This is your general profile page.
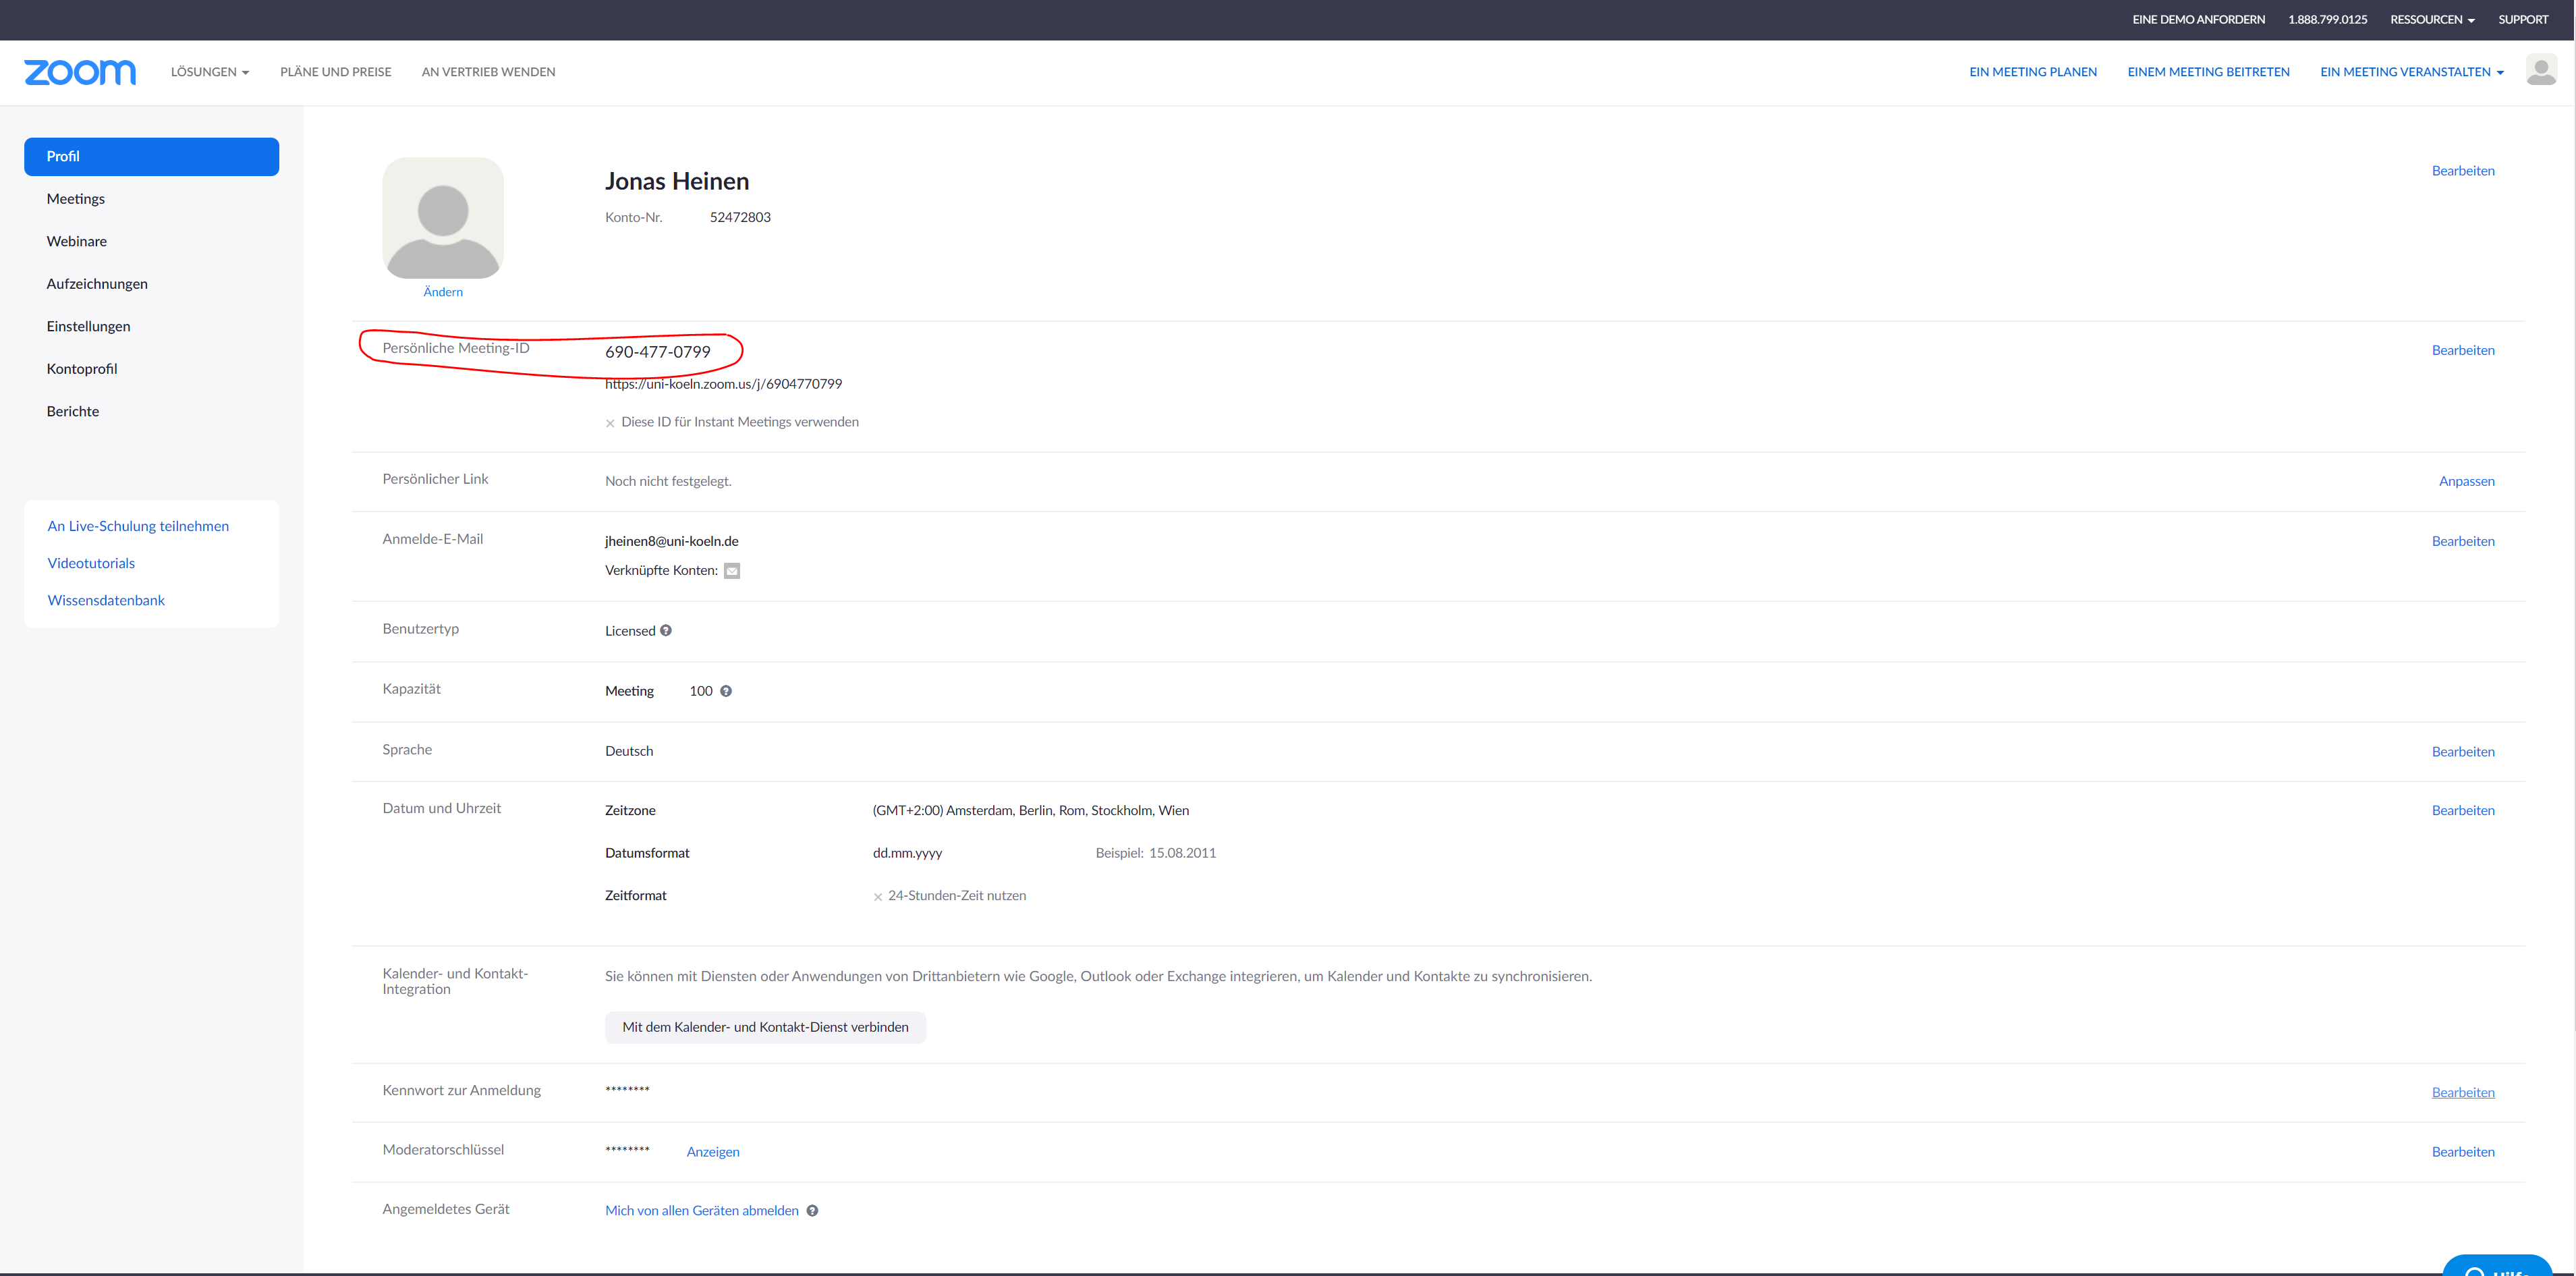
Please note and remember/note their personal meeting ID.
You can use the personal meeting ID if you frequently meet with the same person, as this link does not change, so you do not need to create a new meeting each time.
[This content is not available in "Englisch" yet] Einstellungen
Zoom offers many different setting options. Here we will go into the ones that we think should be changed or thought about.
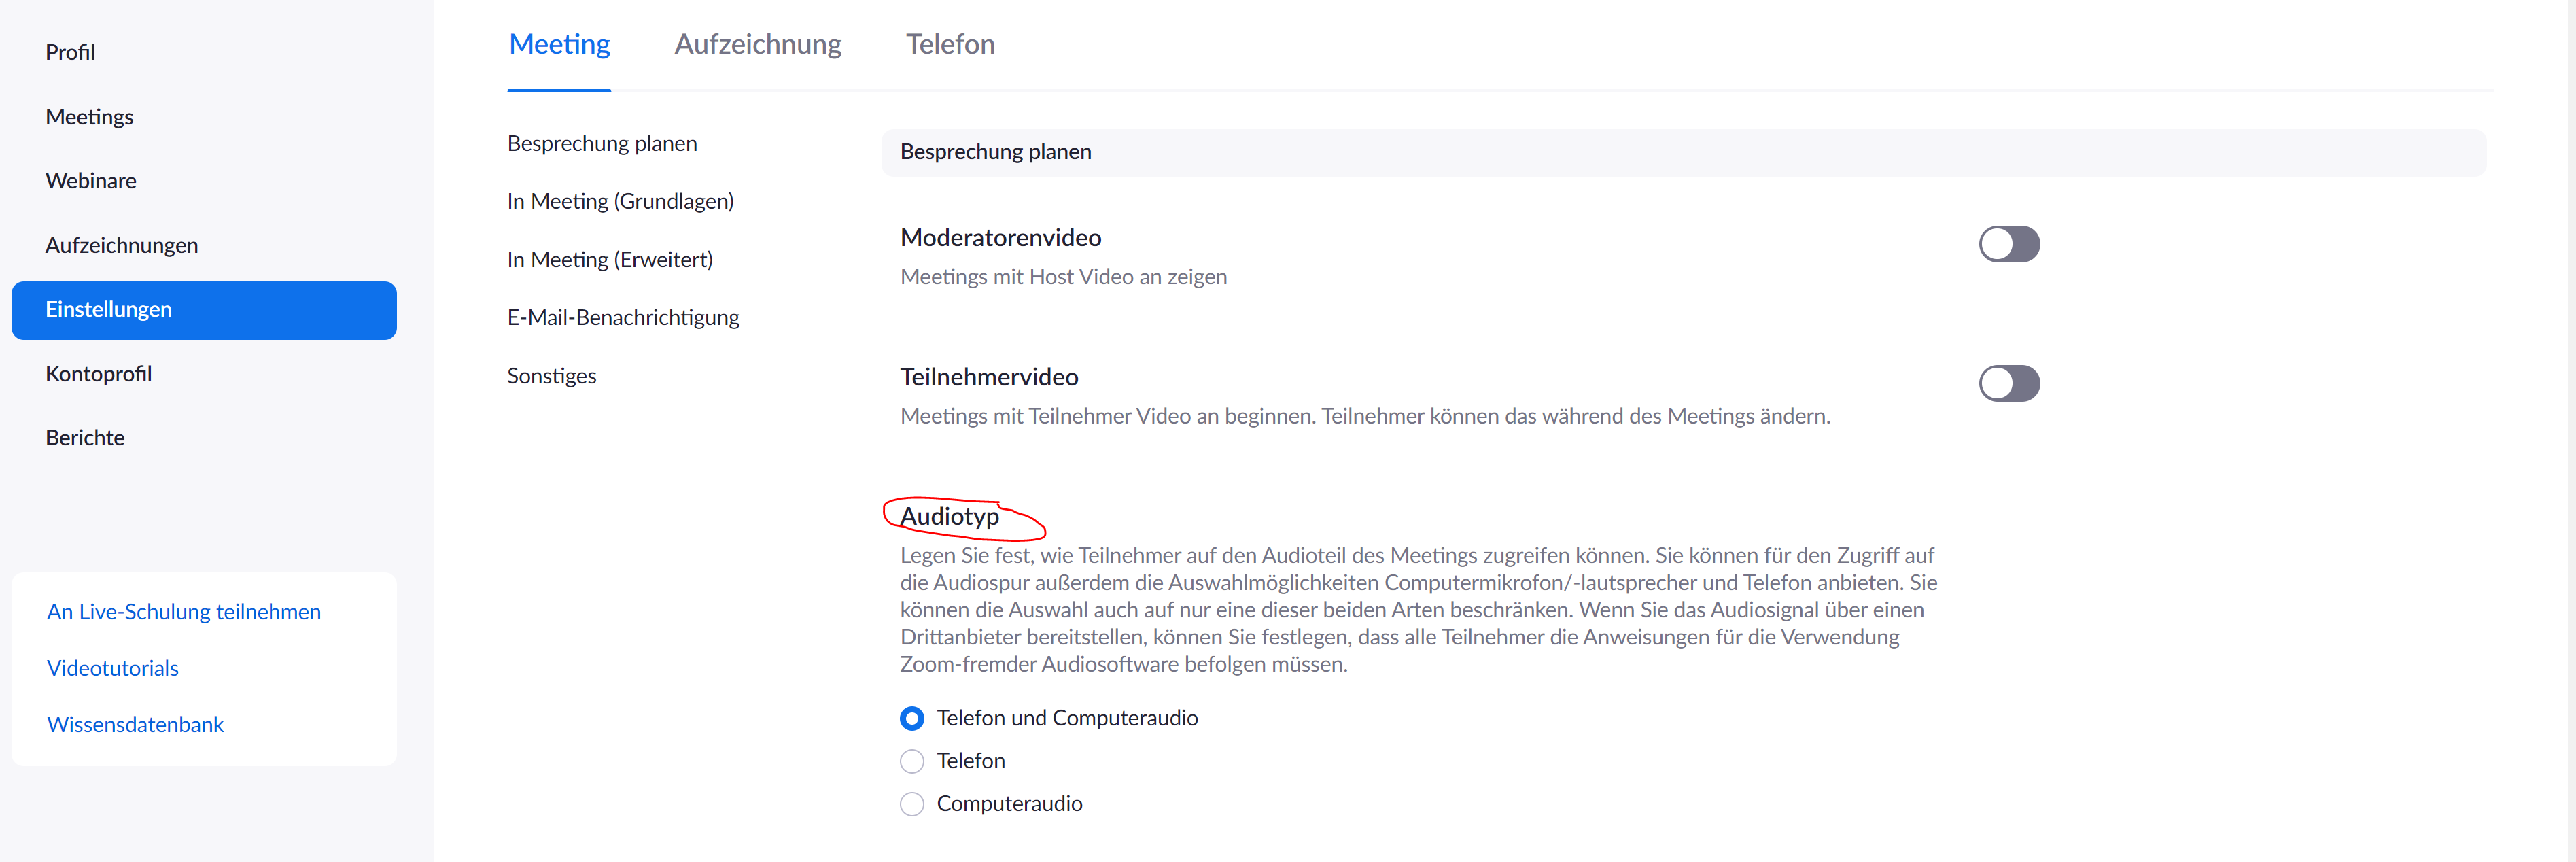
We recommend selecting "Phone and computer audio" here to make it easier for all participants to join.
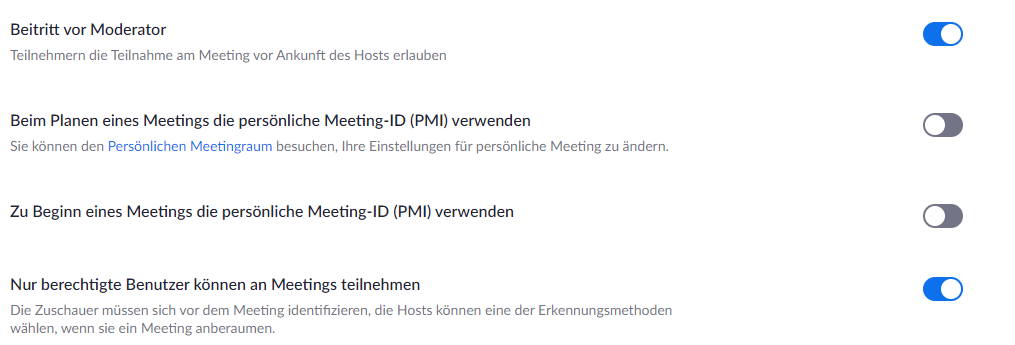
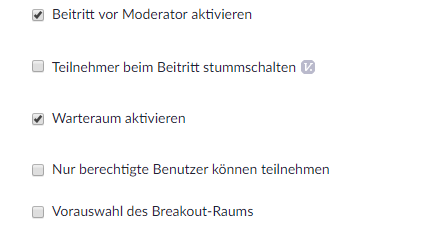
These two settings are intended to prevent unauthorized persons from participating in your meeting. However, in the case of a larger lecture, this is a greater effort, since you have to check the participants individually. In this case it is recommended to use moderators (e.g. assistants) to do this work.
The setting "Only authorized users can participate in meetings" currently requires a Zoom account. It is therefore advisable to check beforehand whether all potential participants have such an account, otherwise please do not activate this setting.
In small seminars or face-to-face meetings, this setting should be deactivated, since an exchange is desired here and the effort for the host is less without the setting.
We recommend enabling these settings for larger events. You can remove these settings manually at any time in the meeting.
[This content is not available in "Englisch" yet]
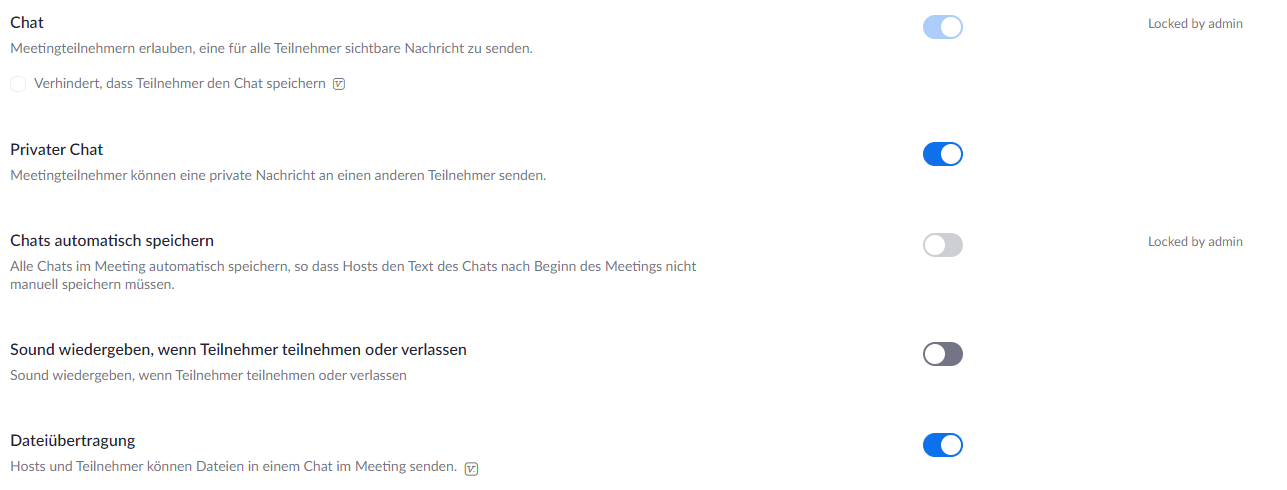
Die Einstellung "privater Chat" sollten Sie nur dann deaktivieren, wenn Sie keinerlei Interaktion zwischen den Teilnehmern und zwischen Ihnen und den Teilnehmer wünschen. Dadurch verringern Sie das Störungsrisiko, limitieren die Teilnehmer jedoch auch in ihren Möglichkeiten.
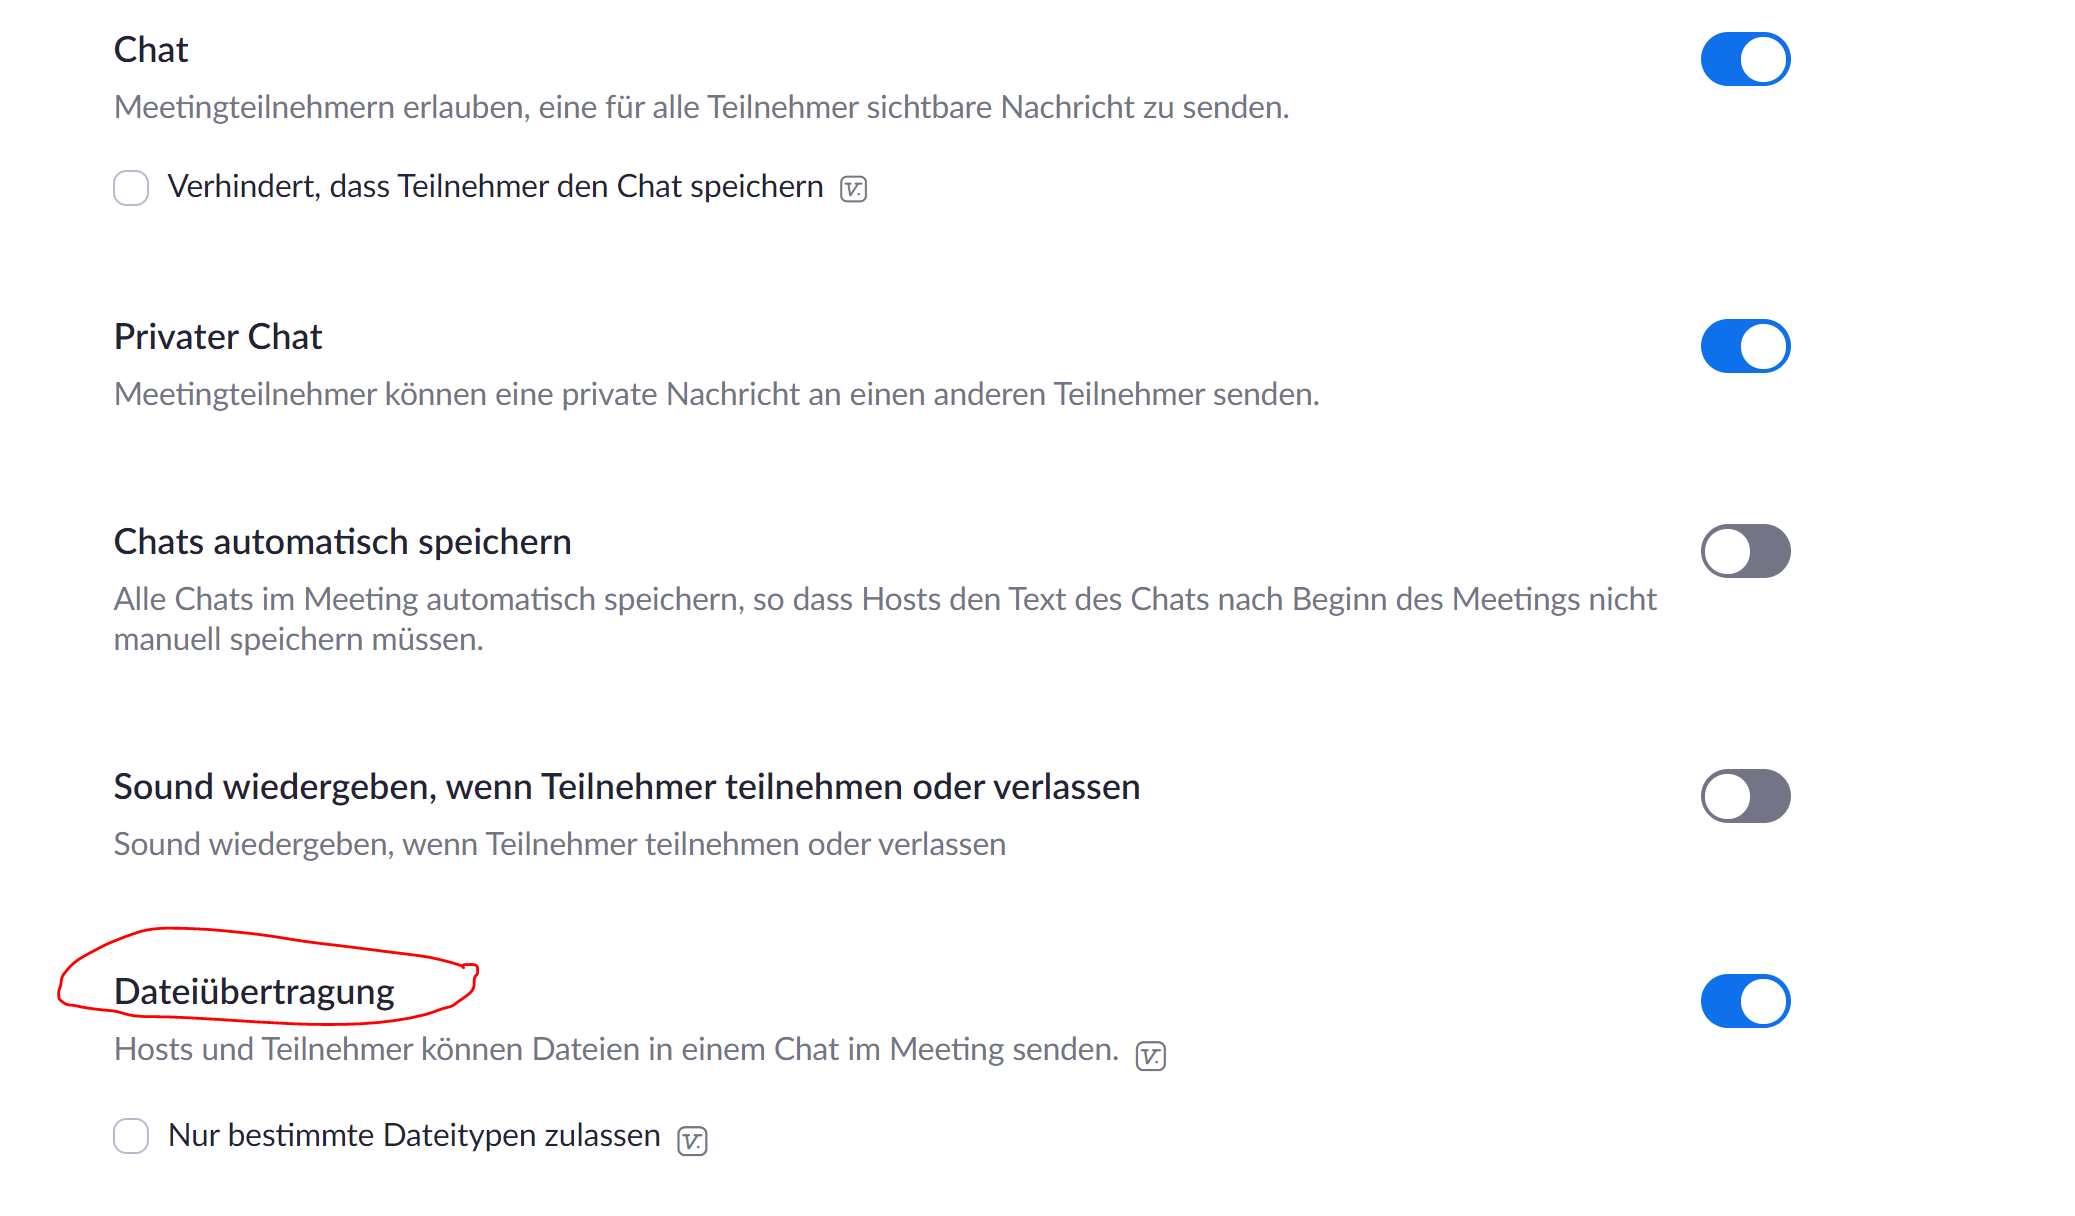
You should only activate this setting if you or the participants need to send files during the seminar (handouts for presentations or similar). Otherwise, you should deactivate this function.
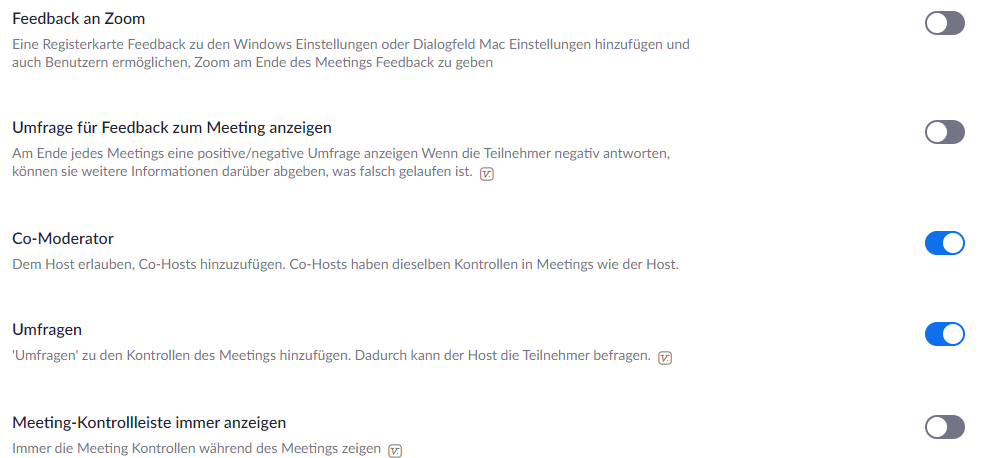
The "Surveys" function is only useful if you want to ask single - or multiple-choice questions in your event. Unfortunately, Zoom does not allow any other type of questions.

[This content is not available in "Englisch" yet]
Die Bildschirmübertragung für Sie als Host kann sehr sinnvoll sein, um Beispiele oder Folien zu zeigen. Jedoch empfehlen wir hier, dass nur Sie – also der Host – und nicht die Teilnehmer Ihren Bildschirm freigeben können, da dieses Feature schnell zu Verwirrung führen kann.
Auch die weiteren markierten Einstellungen sollten Sie deaktivieren, um unerwünschten Zugriff auf Ihren Bildschirm zu verhindern.
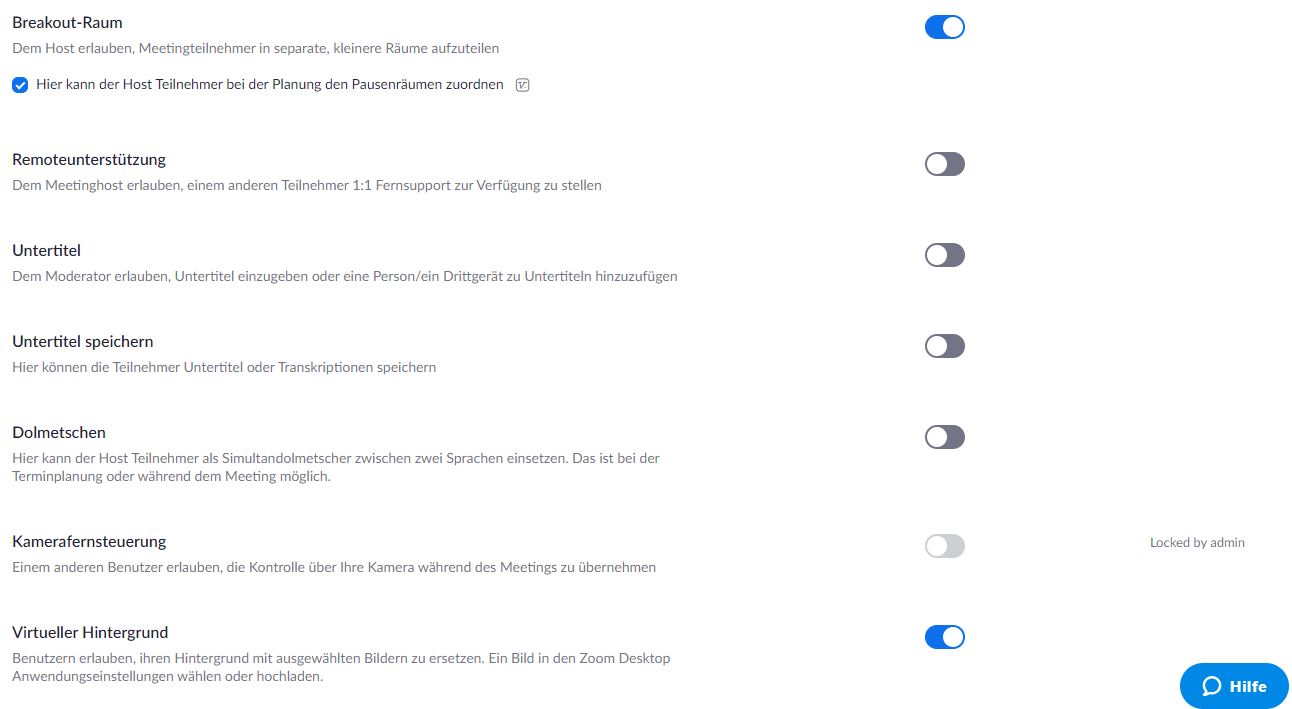
Diese Einstellung können Sie aktivieren, wenn die Teilnehmer während des Meetings in Gruppenarbeit arbeiten sollen.
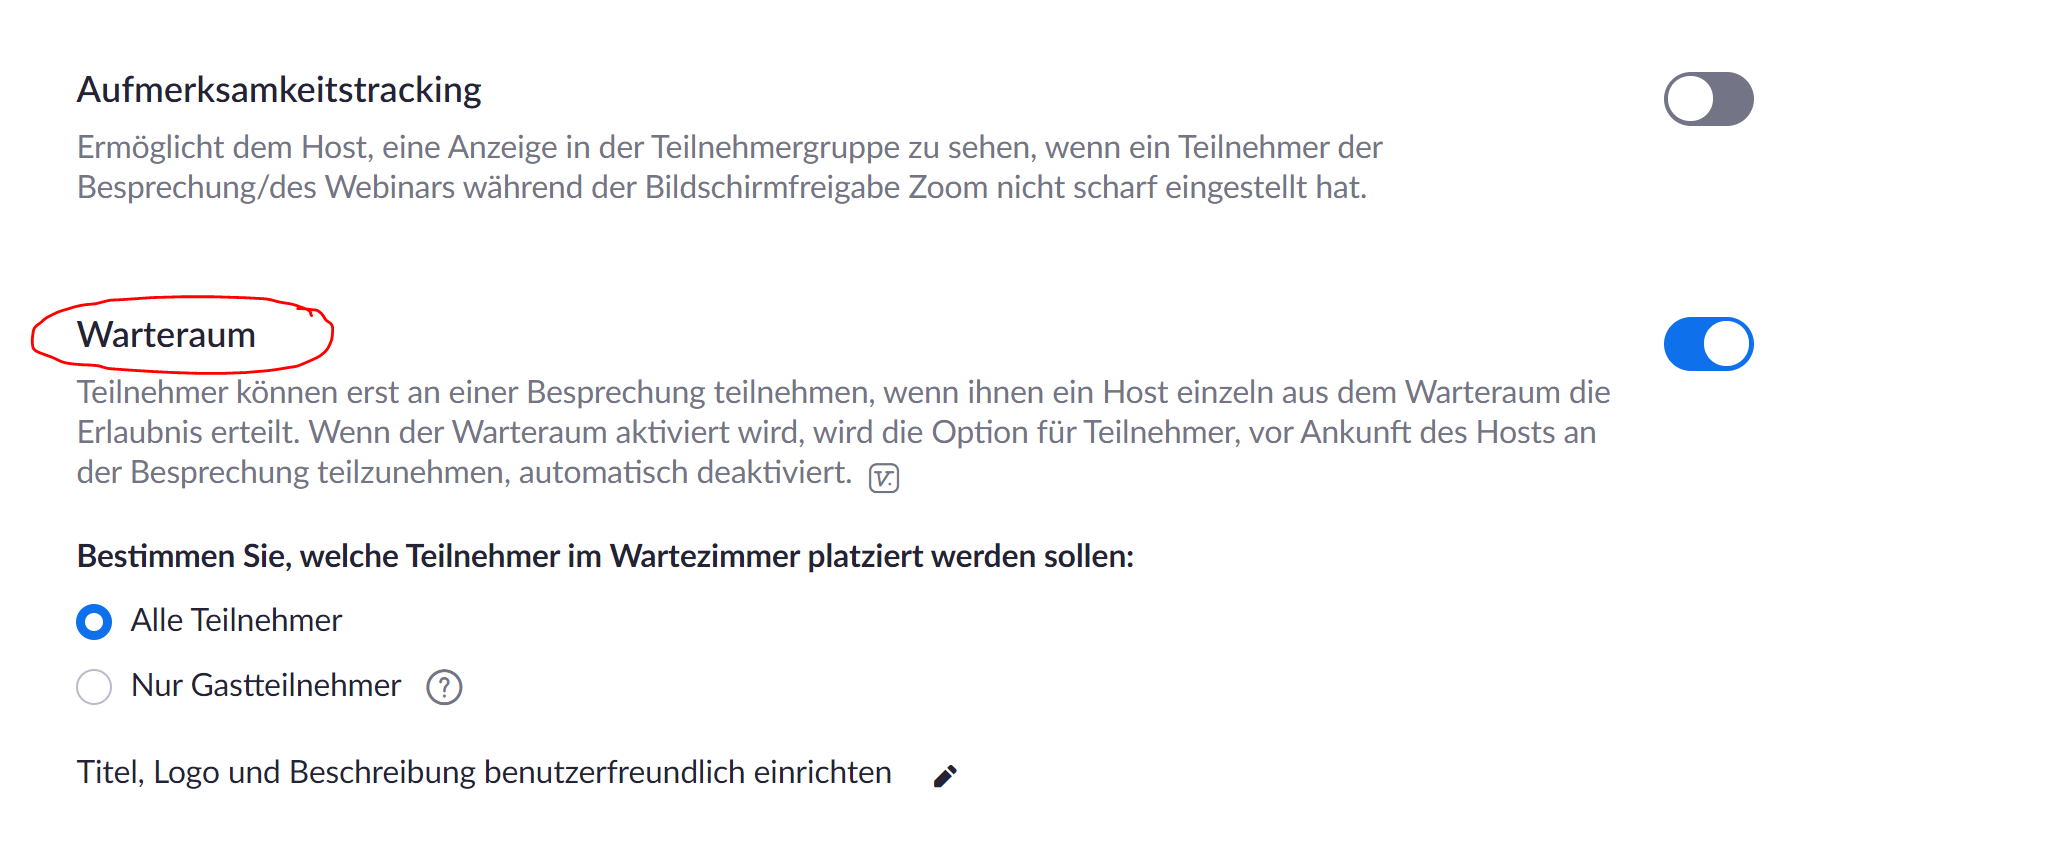
The waiting room is a very important function, as it prevents strangers from joining your meeting. In the actual meeting, you then have the option of admitting the participants to the meeting independently.

You can disable this setting, as we do not recommend recording to the cloud (See Recordings).

Here you can set another language if there are Erasmus or similar students in your course. students are in your course.
Recordings
Zoom offers the possibility to record your meetings. For this purpose, the options of a local and a cloud storage are offered. If you want to make the meeting available to students at a later date, recording is definitely an option.
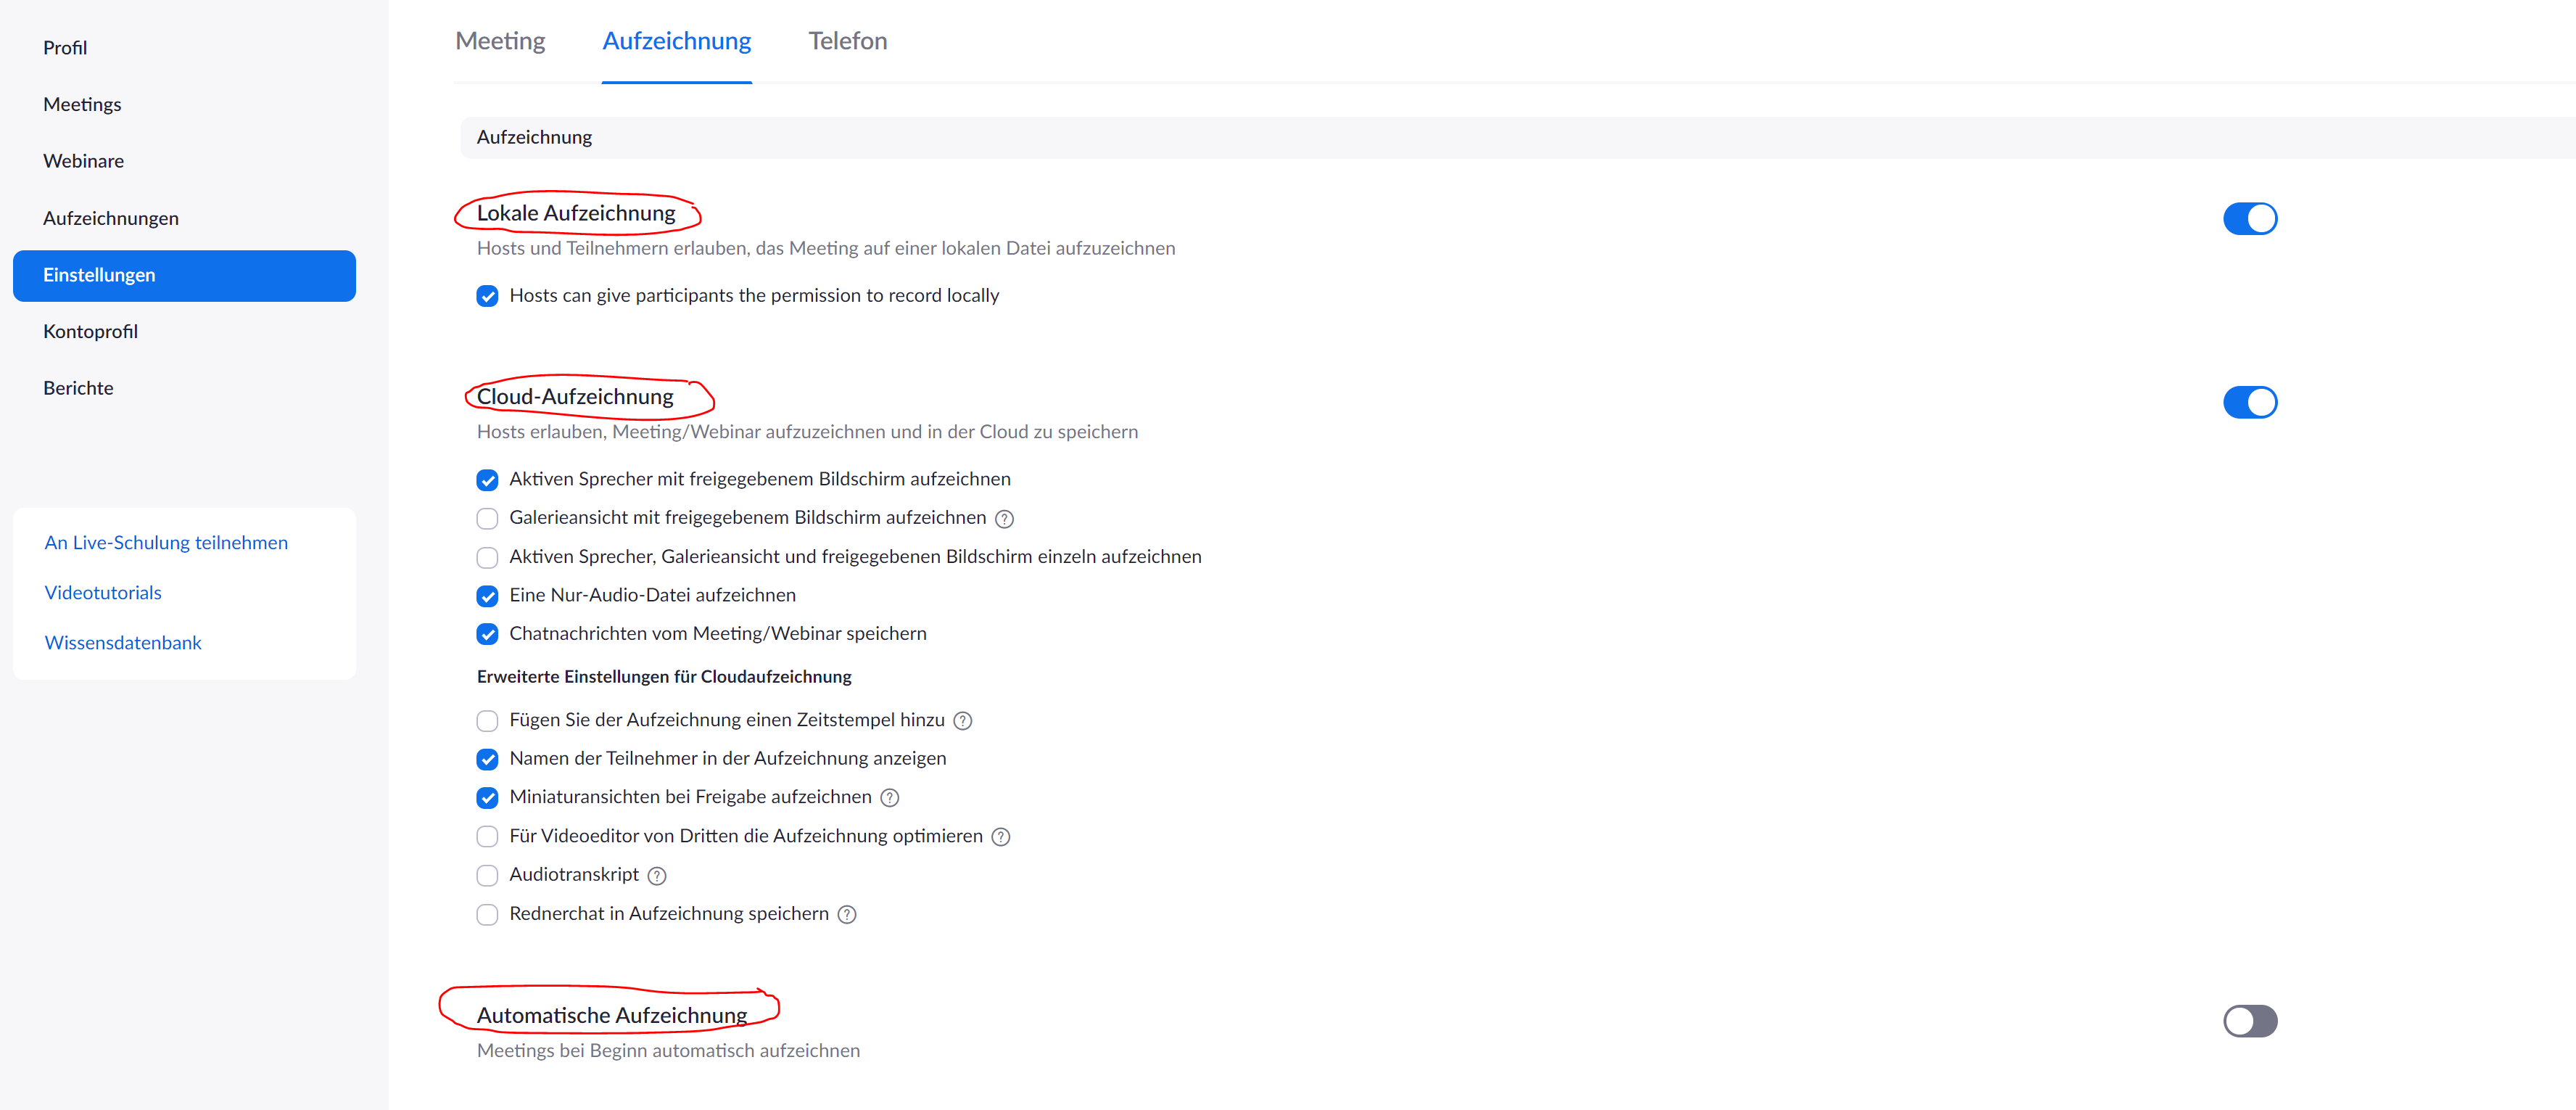
We recommend saving the session only locally, i.e. on your PC. Zoom's cloud is located in the USA and storing our files and content on these servers is absolutely not advisable for privacy reasons! If recording locally, attendees may also be given the option to record the session themselves. If you want to upload your session anyway, you can disable this feature. In addition, it is recommended to set the automatic recording.

You can access existing records via your profile page.
Meeting settings
You can already make important settings before the meeting begins. We show you here how to plan a new meeting and which settings to consider.
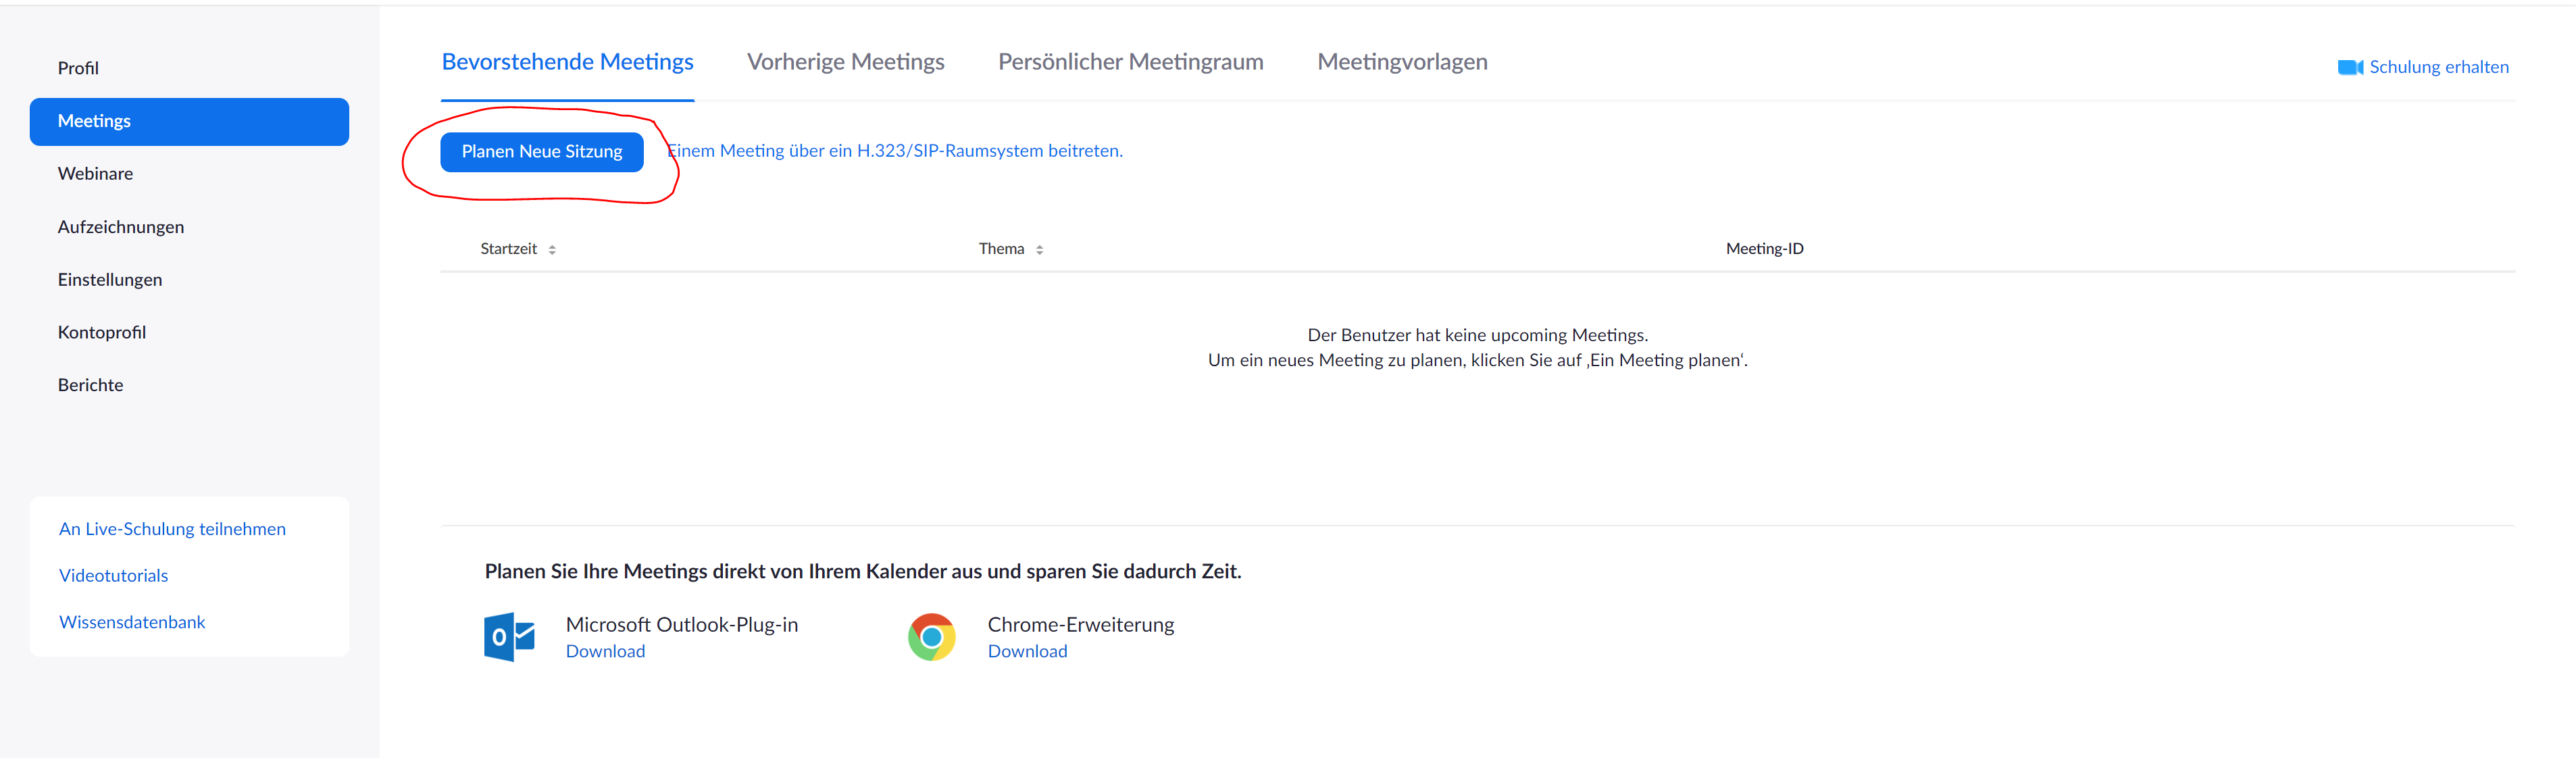
Here you can create a new session/meeting.

[This content is not available in "Englisch" yet]
Sie können ein bereits erstelltes Meeting als Vorlage speichern und an dieser Stelle einfügen, wenn sie alle Einstellungen übernehmen wollen. Zudem können Sie das Meeting regelmäßig wiederholen, wenn Sie Ihren Kurs jede Woche mit Zoom abhalten möchten. Es empfiehlt sich auch die Registrierungs-Funktion zu deaktivieren, da die Studierenden sonst einen Zoom-Account erstellen müssten.
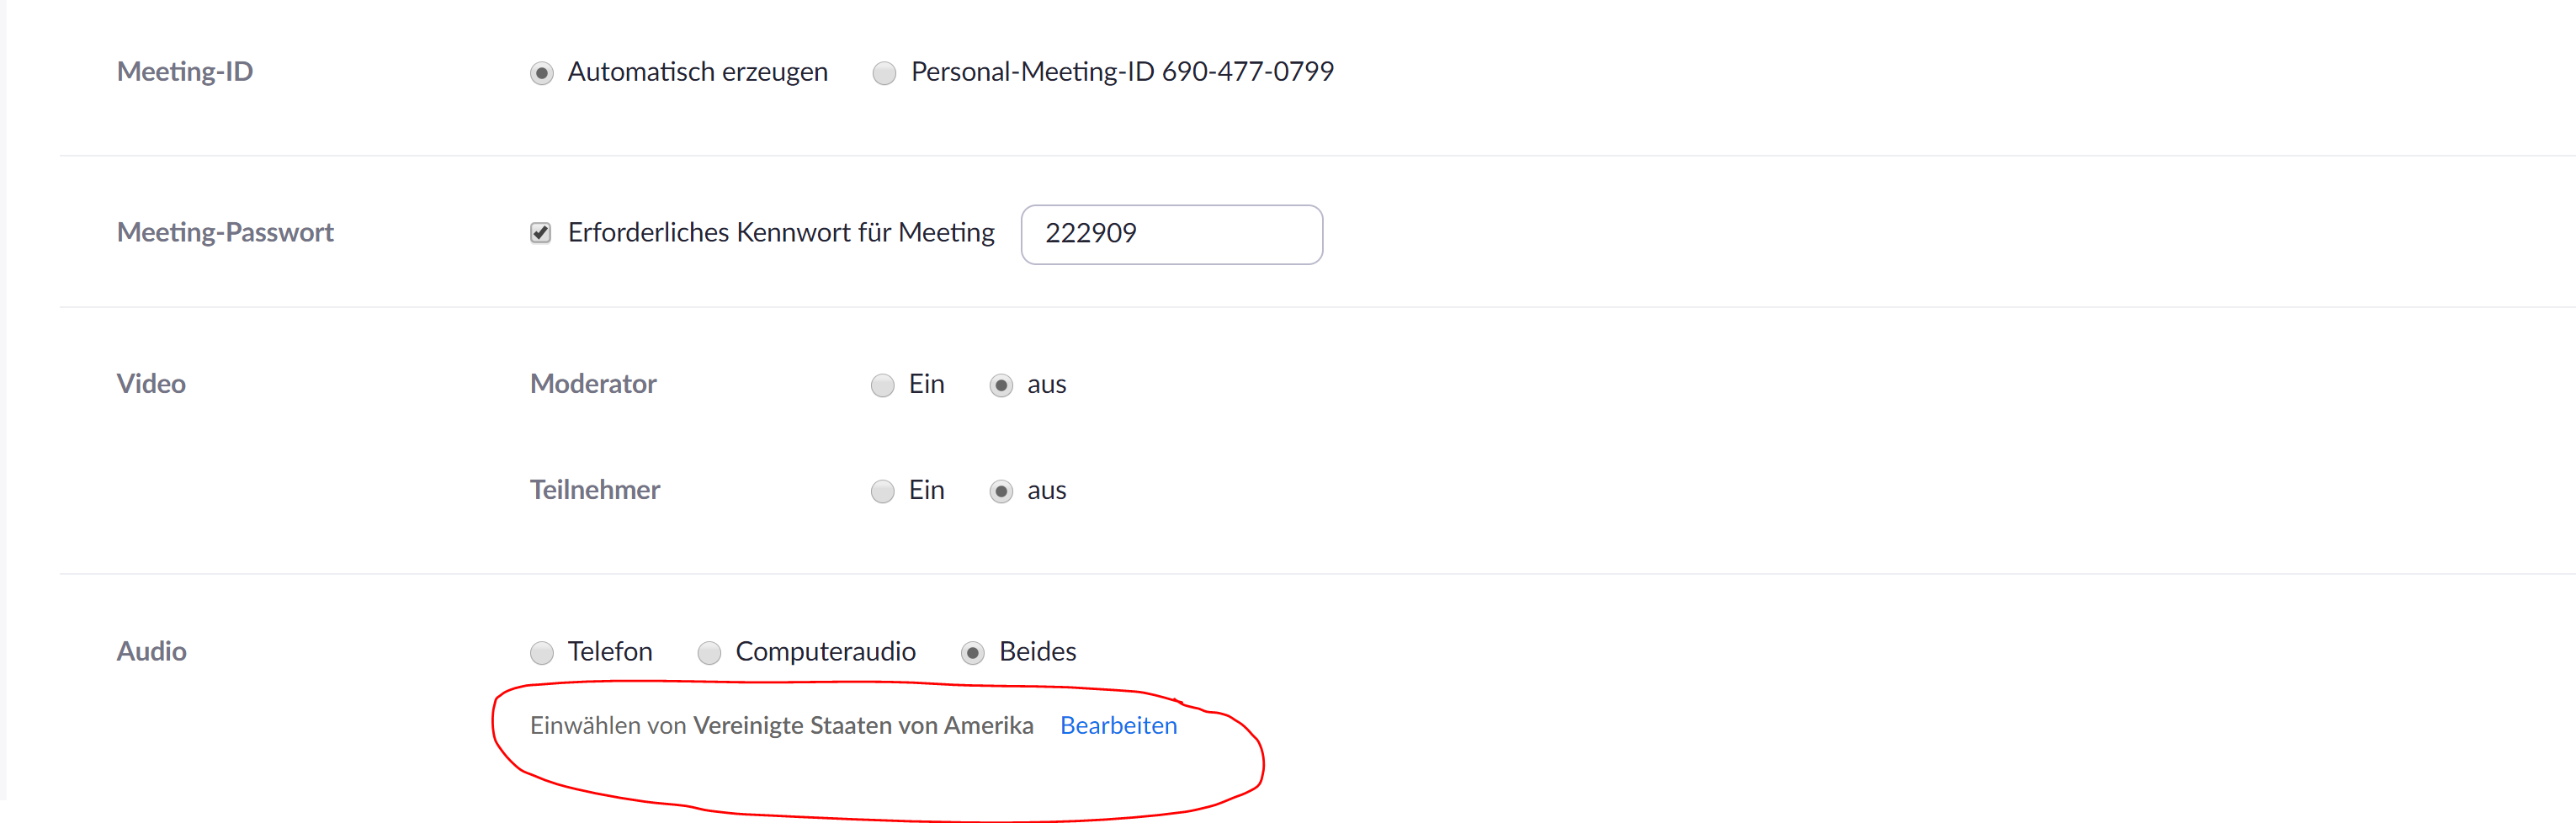
Select Germany as an additional option to ensure that all participants can attend the meeting.
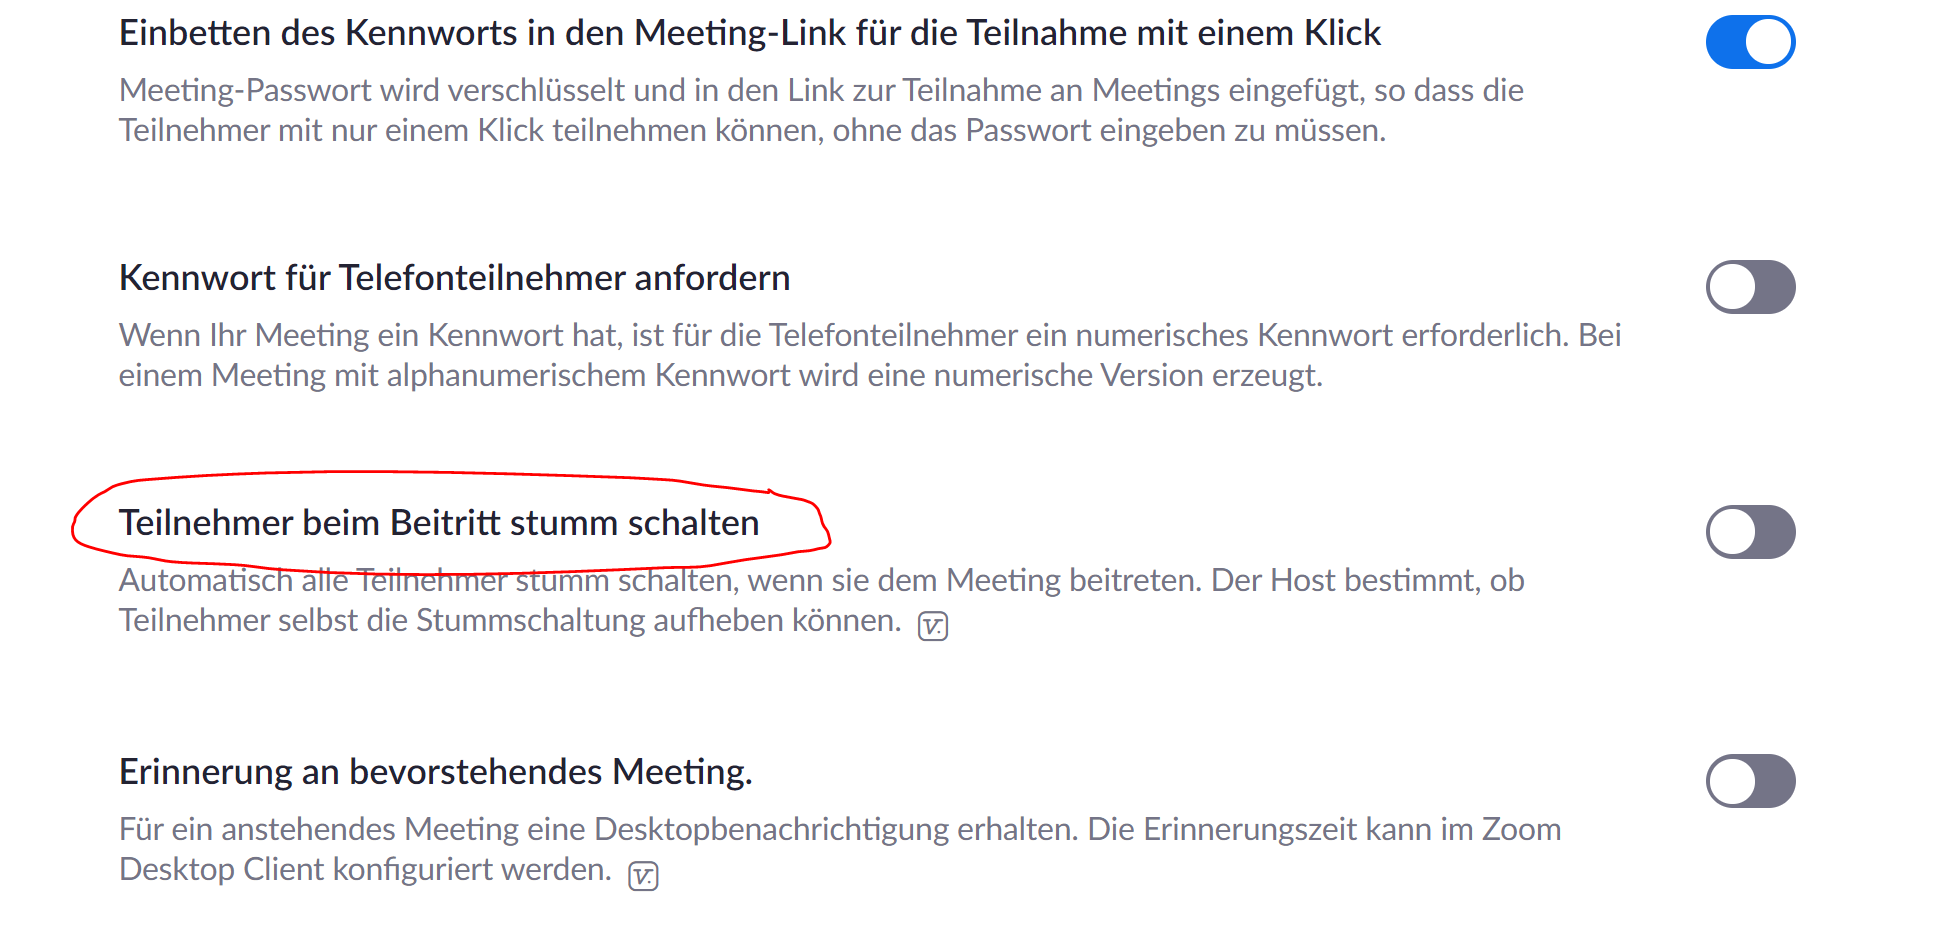
We recommend that you activate these two options here to enable a reasonable first entry into the meeting. You can also remove the muting spontaneously in the meeting. If you use additional moderators for a larger event, you can add them here.
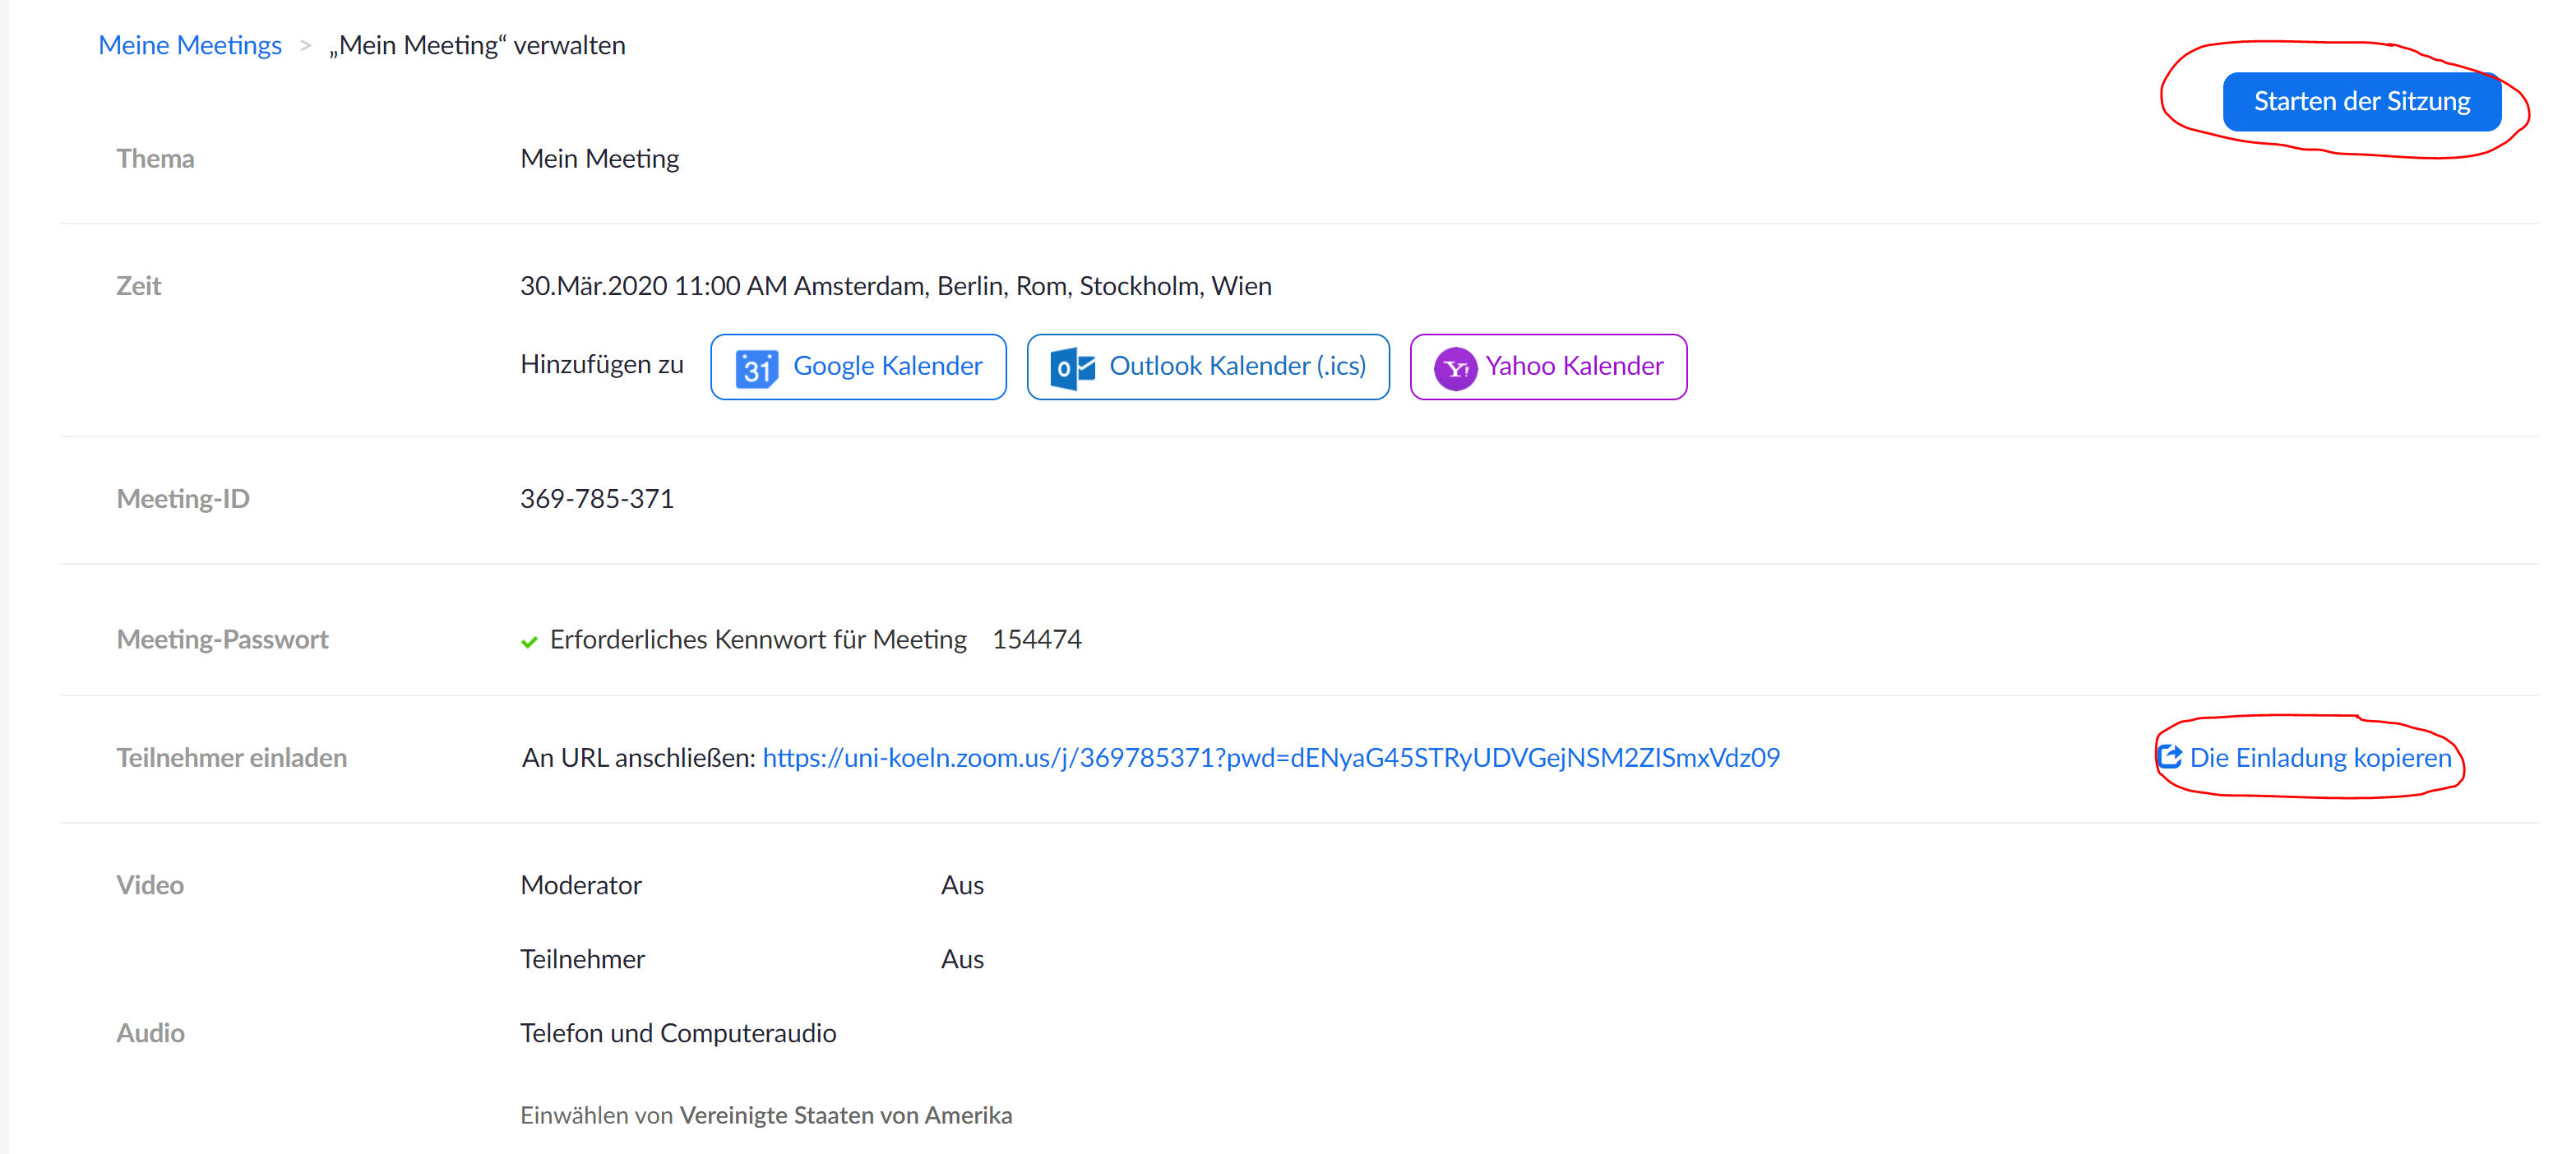
Here you will see the overview page of a created meeting. You can now start this meeting independently or wait for the set time. You can also copy the link and send it to the course participants via ILIAS, for example.
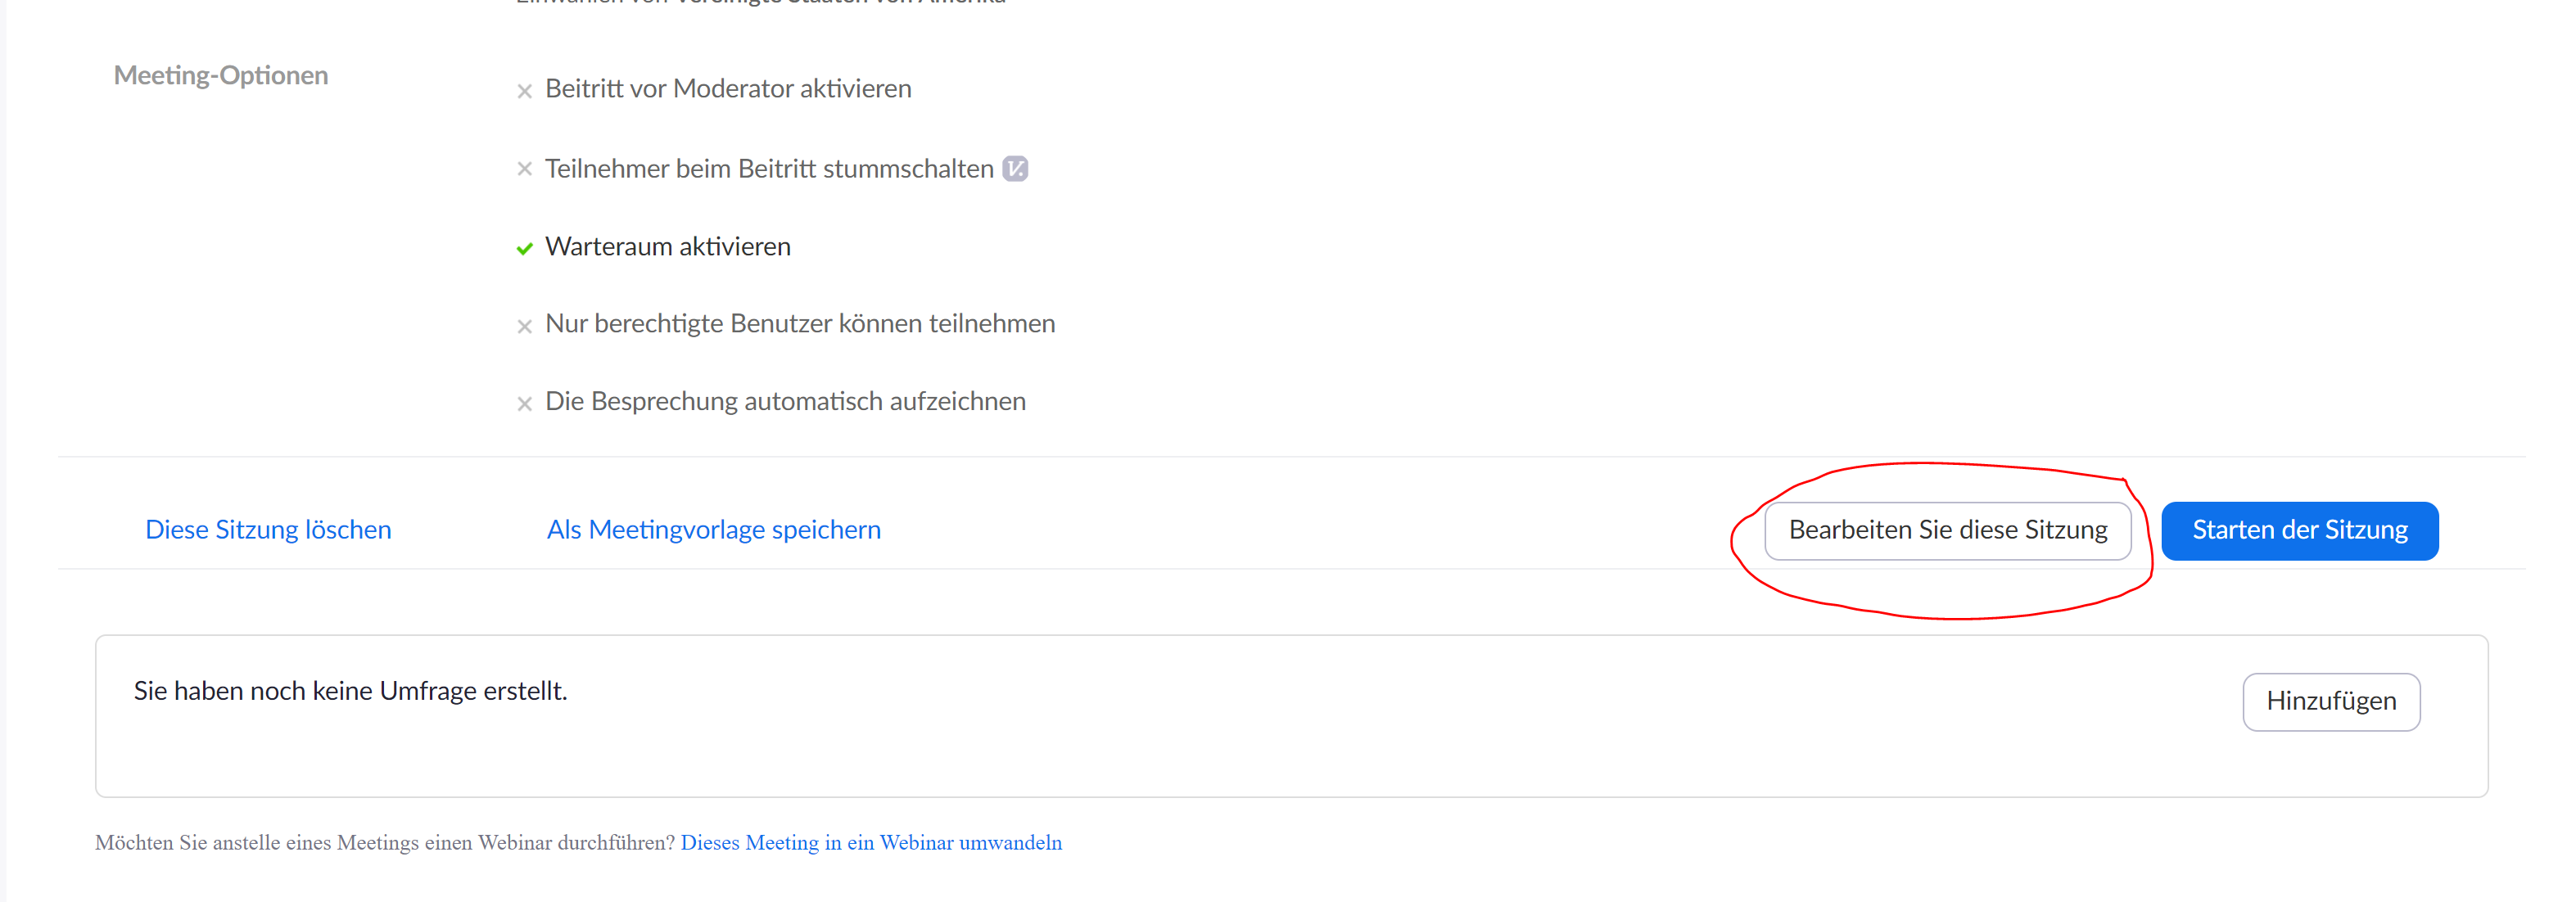
Of course, you can also edit the meeting settings afterwards. We generally recommend creating and scheduling meetings early.

Here you can also save the created meeting as a template.
Starting the meeting

If you start the session now, you will be redirected to this website.
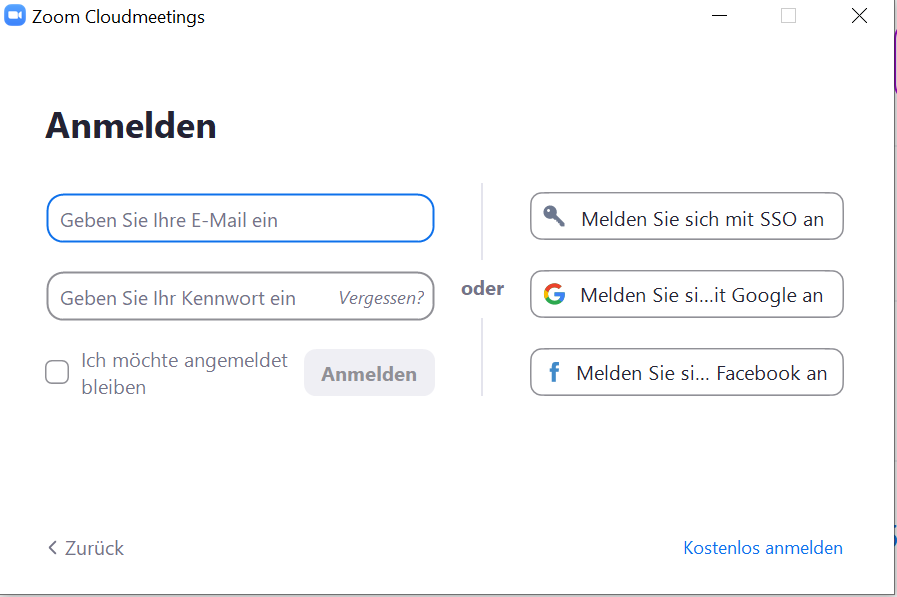
Zoom downloads a separate app when you first use it, which is then used to run the meetings. You can then simply log in to this app (with SSO) and access your scheduled meetings.
SSO stands for Single-Sign-On, so you only have to log in once, after which Zoom should automatically log you in again.
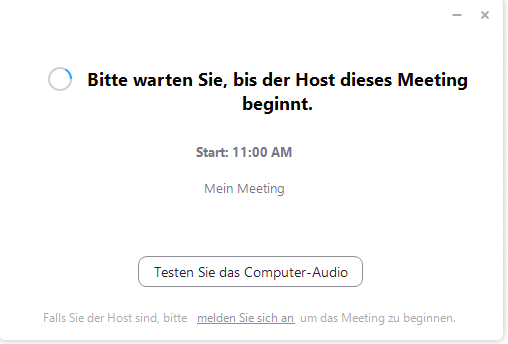
Participants will be shown the following picture before the meeting if a waiting room is set up.
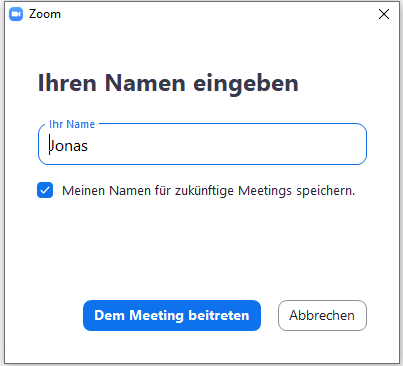
Once the meeting has started, participants can first select the name. We recommend here to inform the students before the meeting that they should use their correct name so that it can be checked who is participating in the meeting.
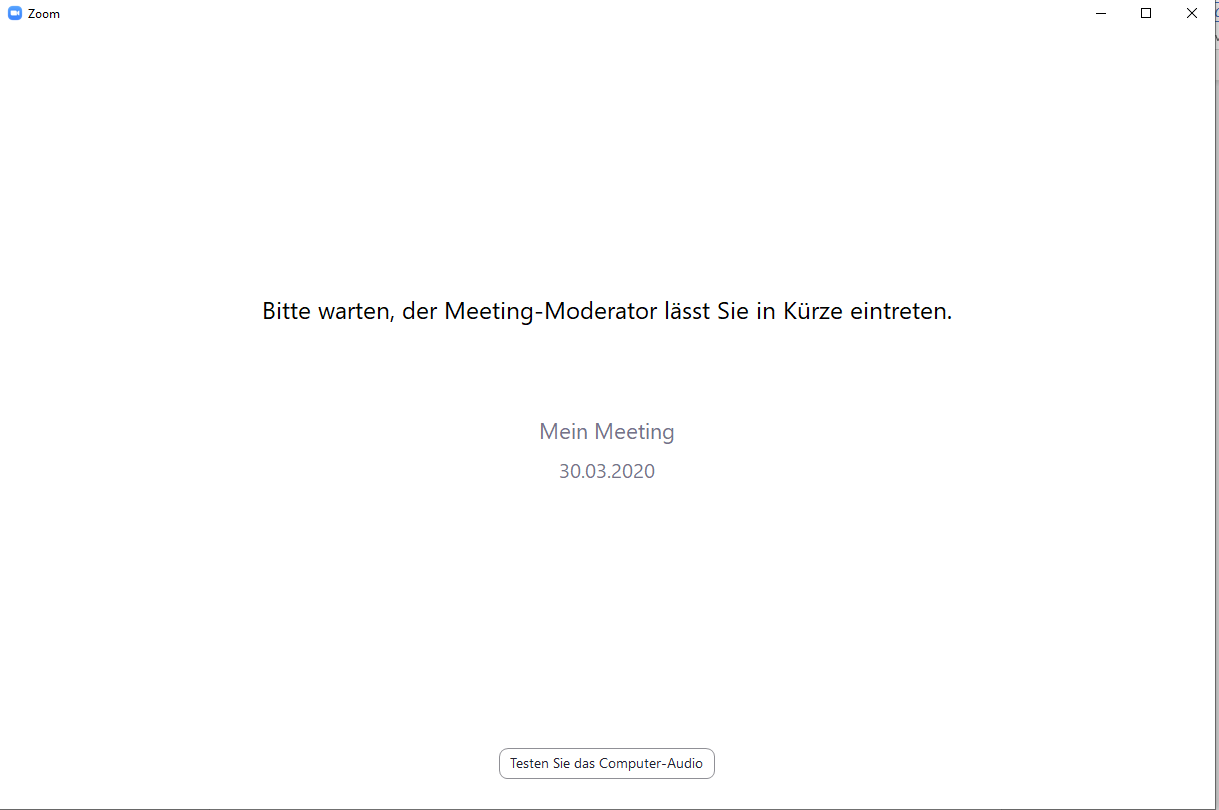
When joining a session is regulated by a facilitator, the participants get the following picture.
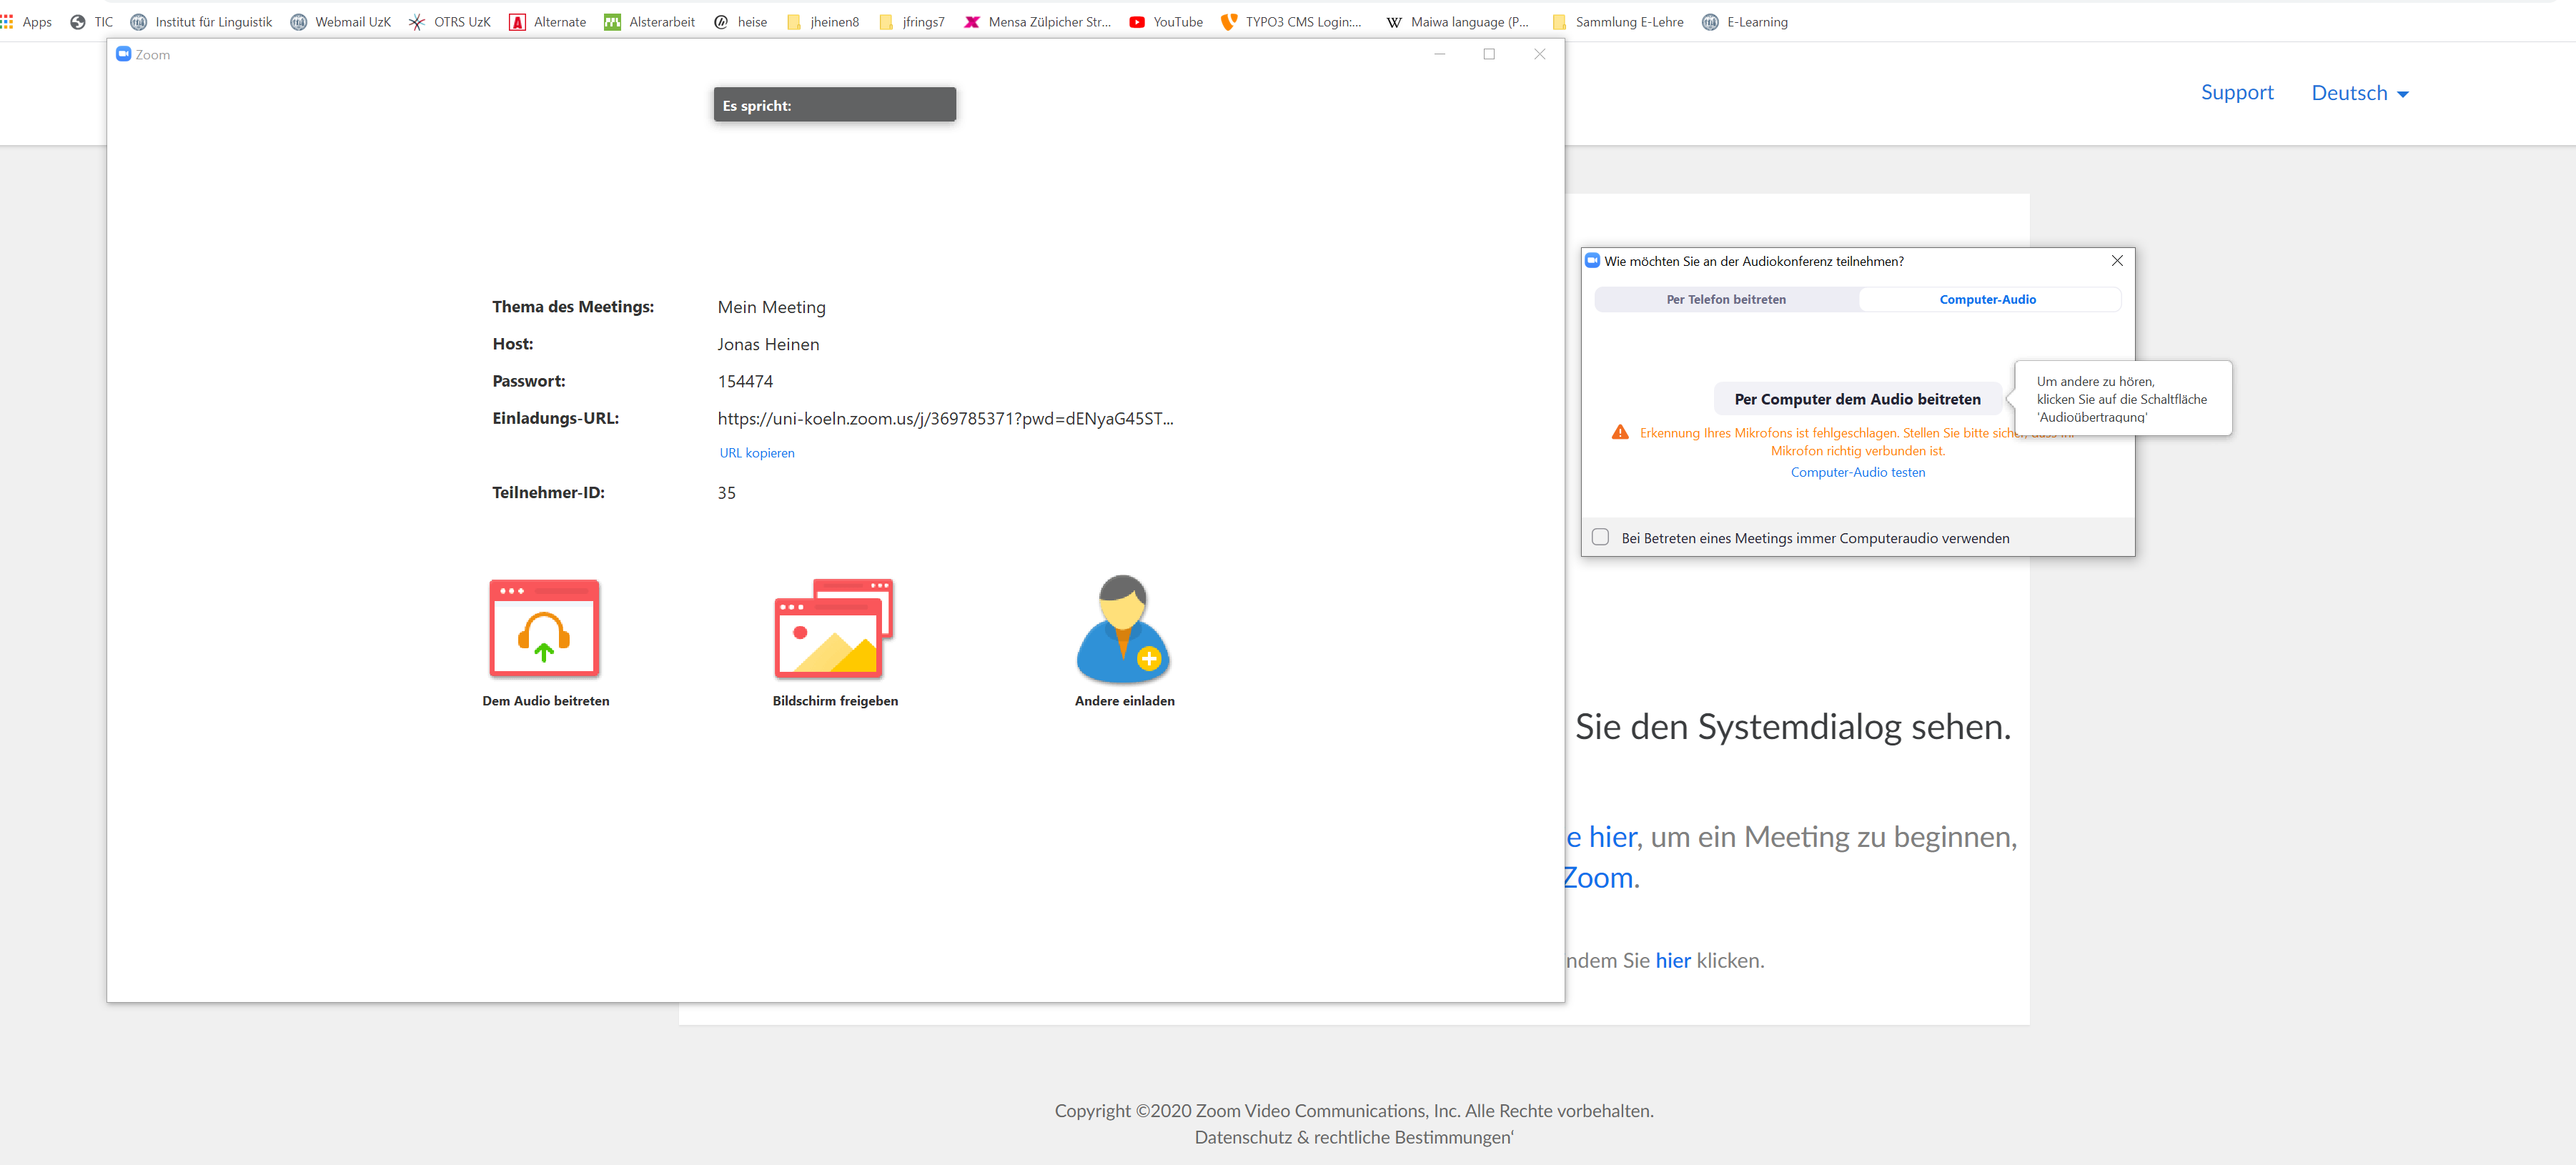
When you join a meeting for the first time, Zoom first checks your audio settings. Make sure here that the correct microphone is selected as the source (laptop microphone vs. connected headset).
Meeting interaction
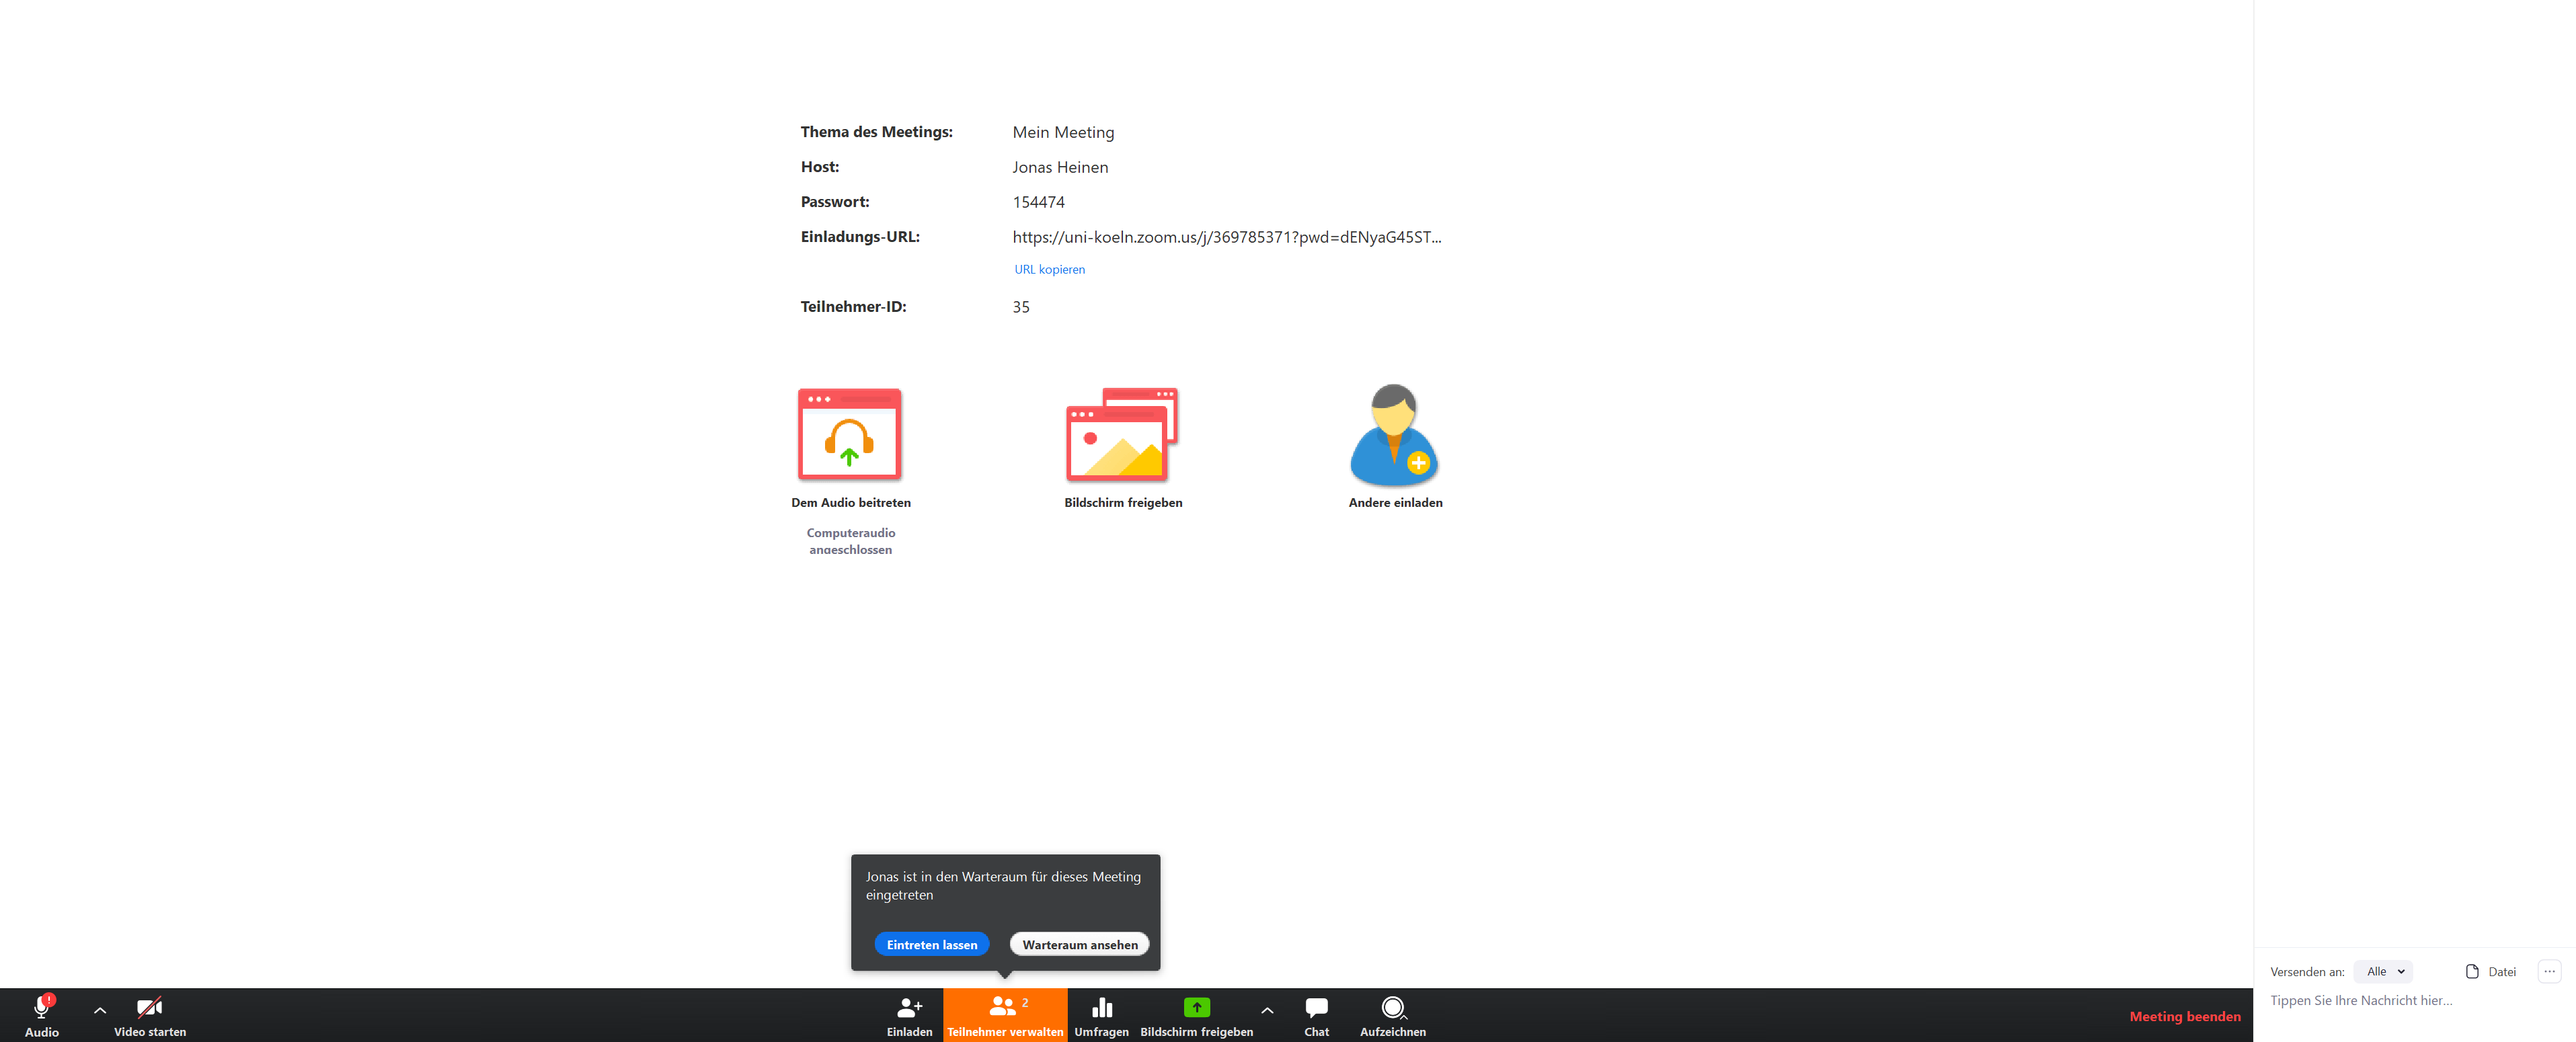
This shows you when a new person joins the meeting. Depending on your settings, new participants are first directed to the waiting room and must then be activated by you.
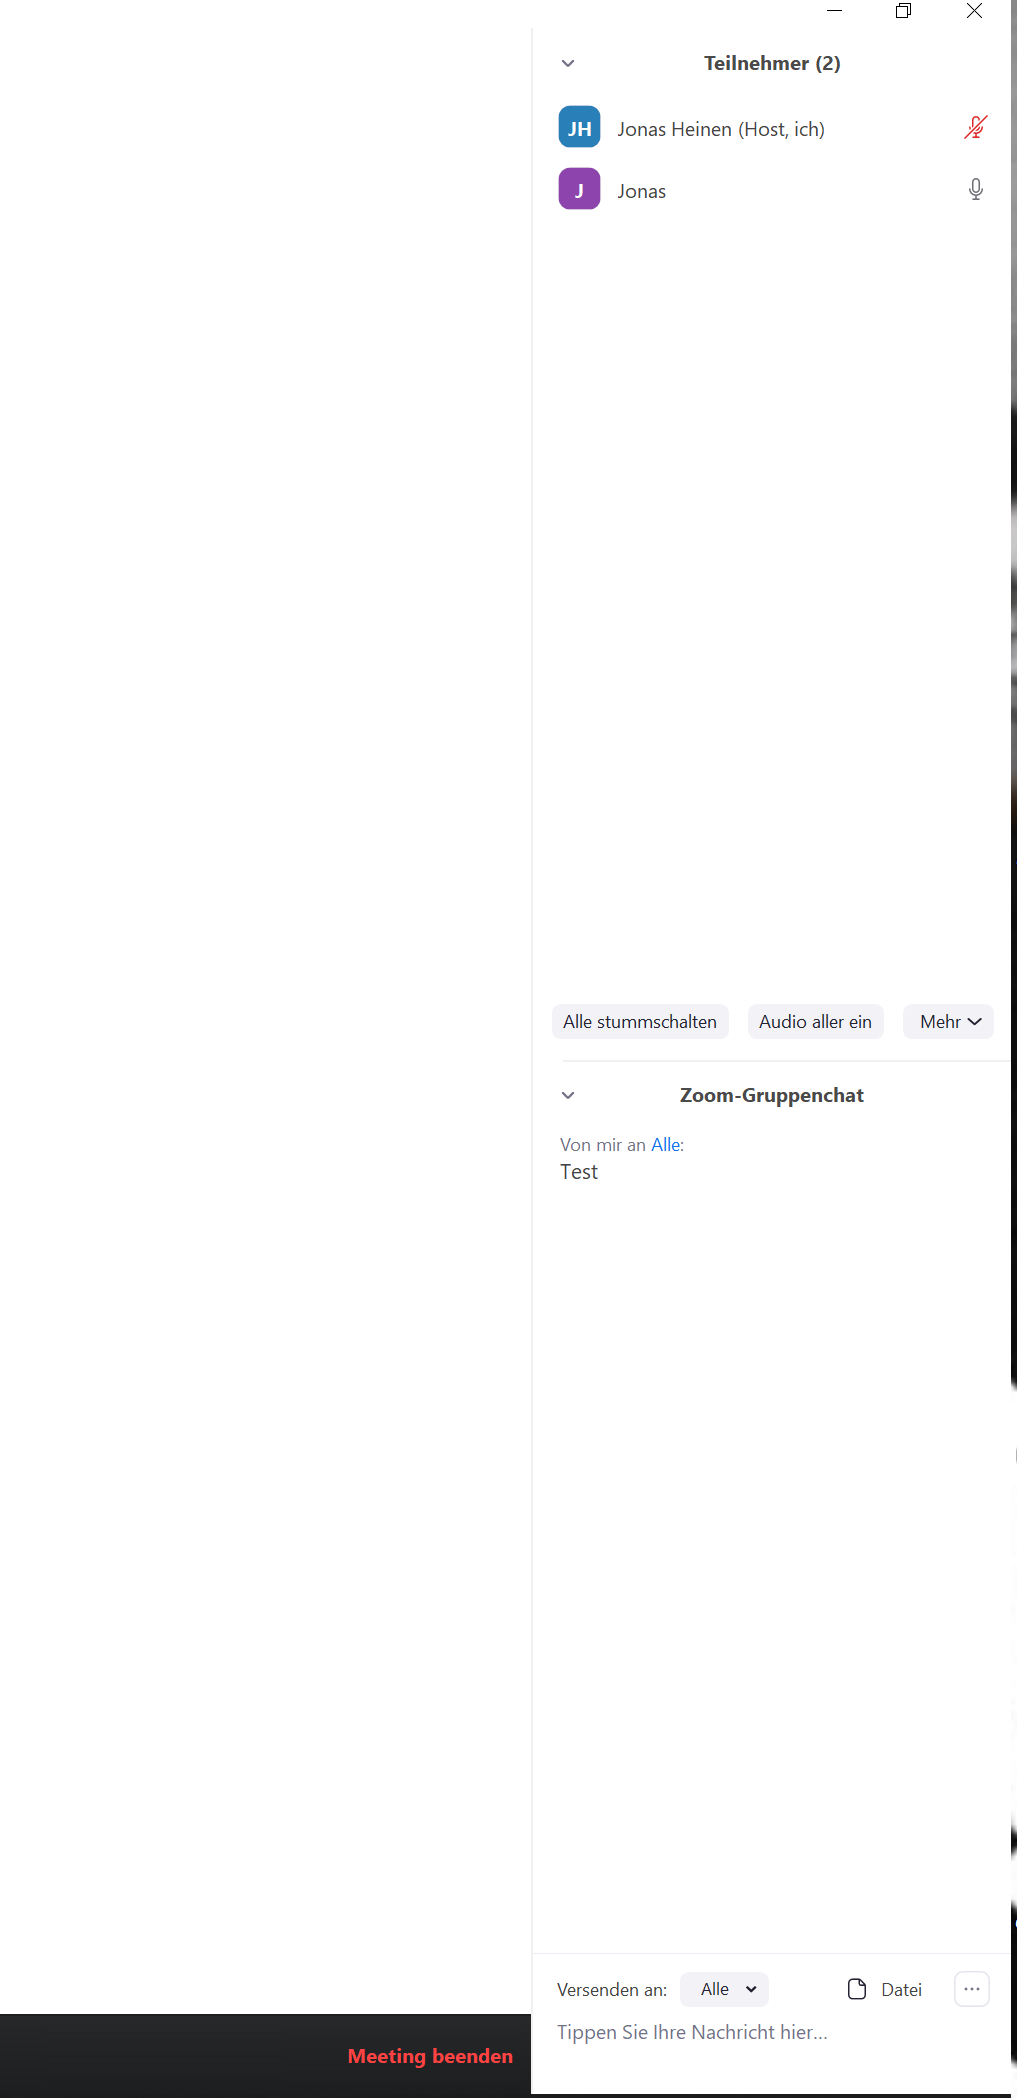
If you have activated the overview of participants and chat in the bottom bar, they are displayed on the right-hand side. Here you also have an overview of the muting and other setting options.
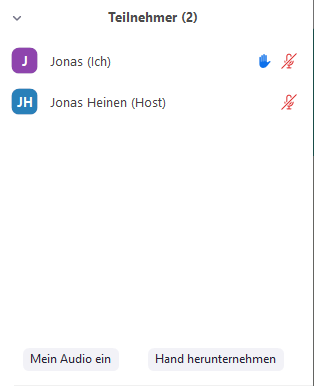
Participants have the opportunity to raise a virtual hand during the session to ask a question. However, as a lecturer, you must also pay attention to this.

You will then see the raised hand in your overview next to the respective participant.

In the bottom bar, you have more options to further modify the session.
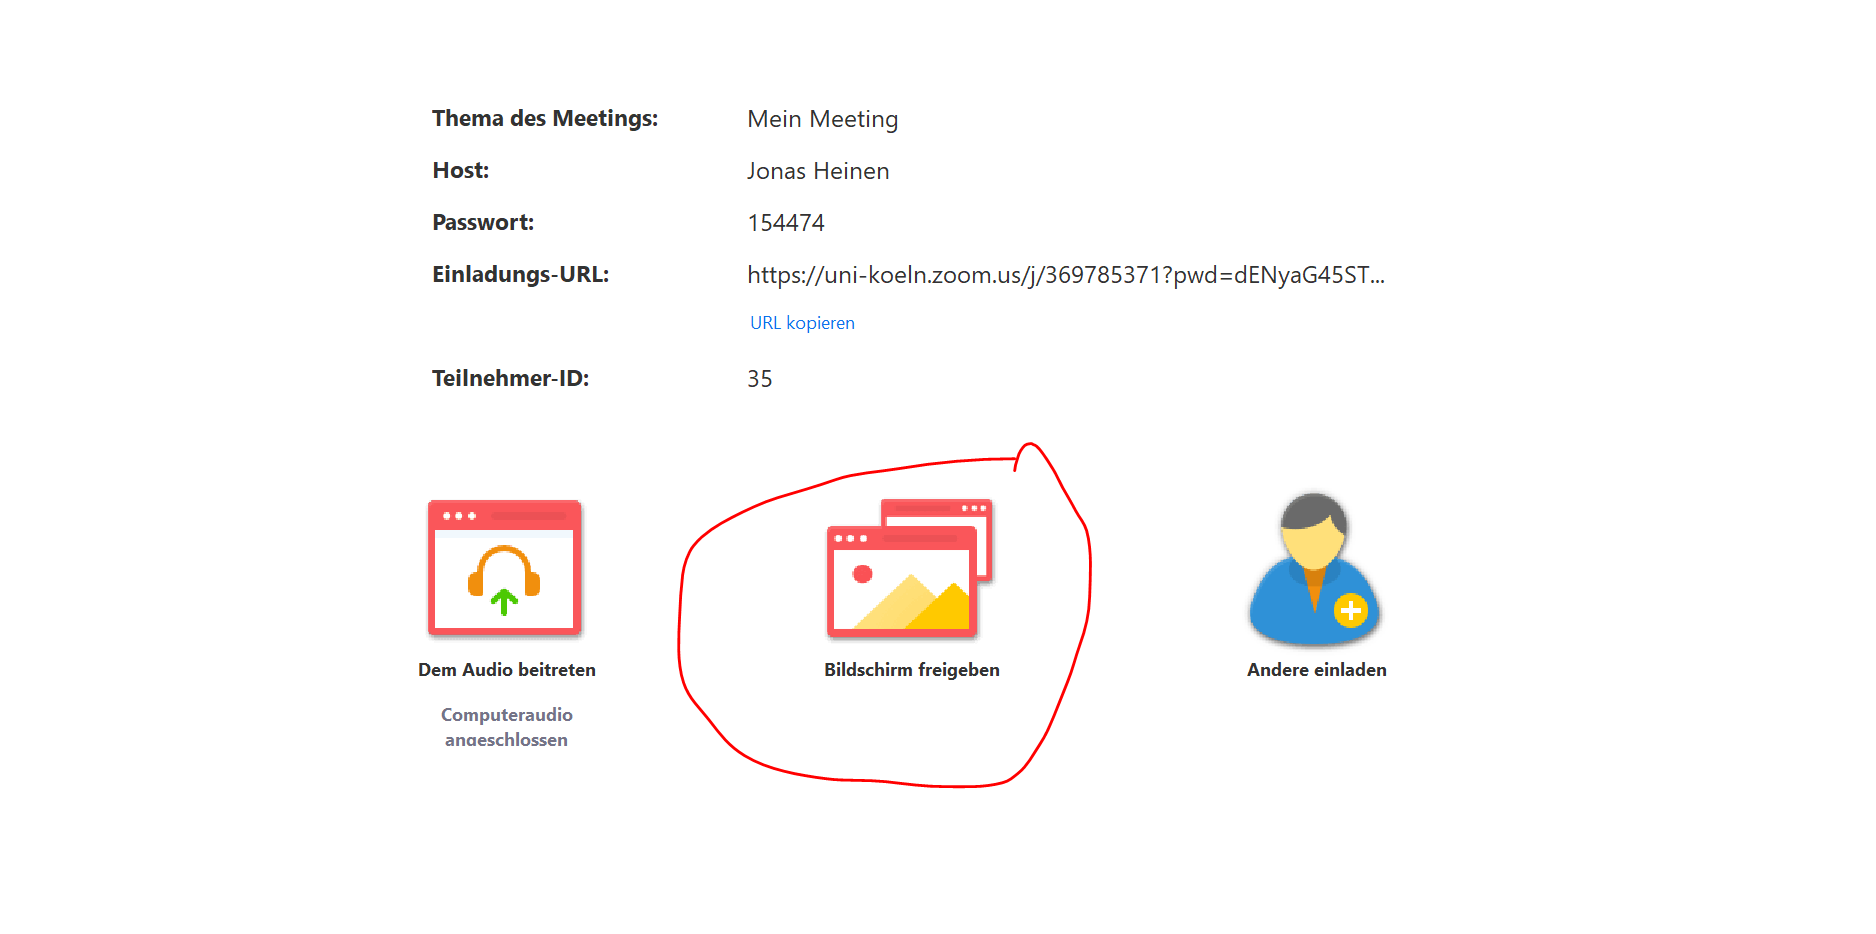
You also have the option to share your screen with the participants. However, make sure that you release the correct part or the correct window. This is not always easy, especially when working with 2 screens, and should be practised beforehand.
This is what your split screen will look like from the participants' point of view
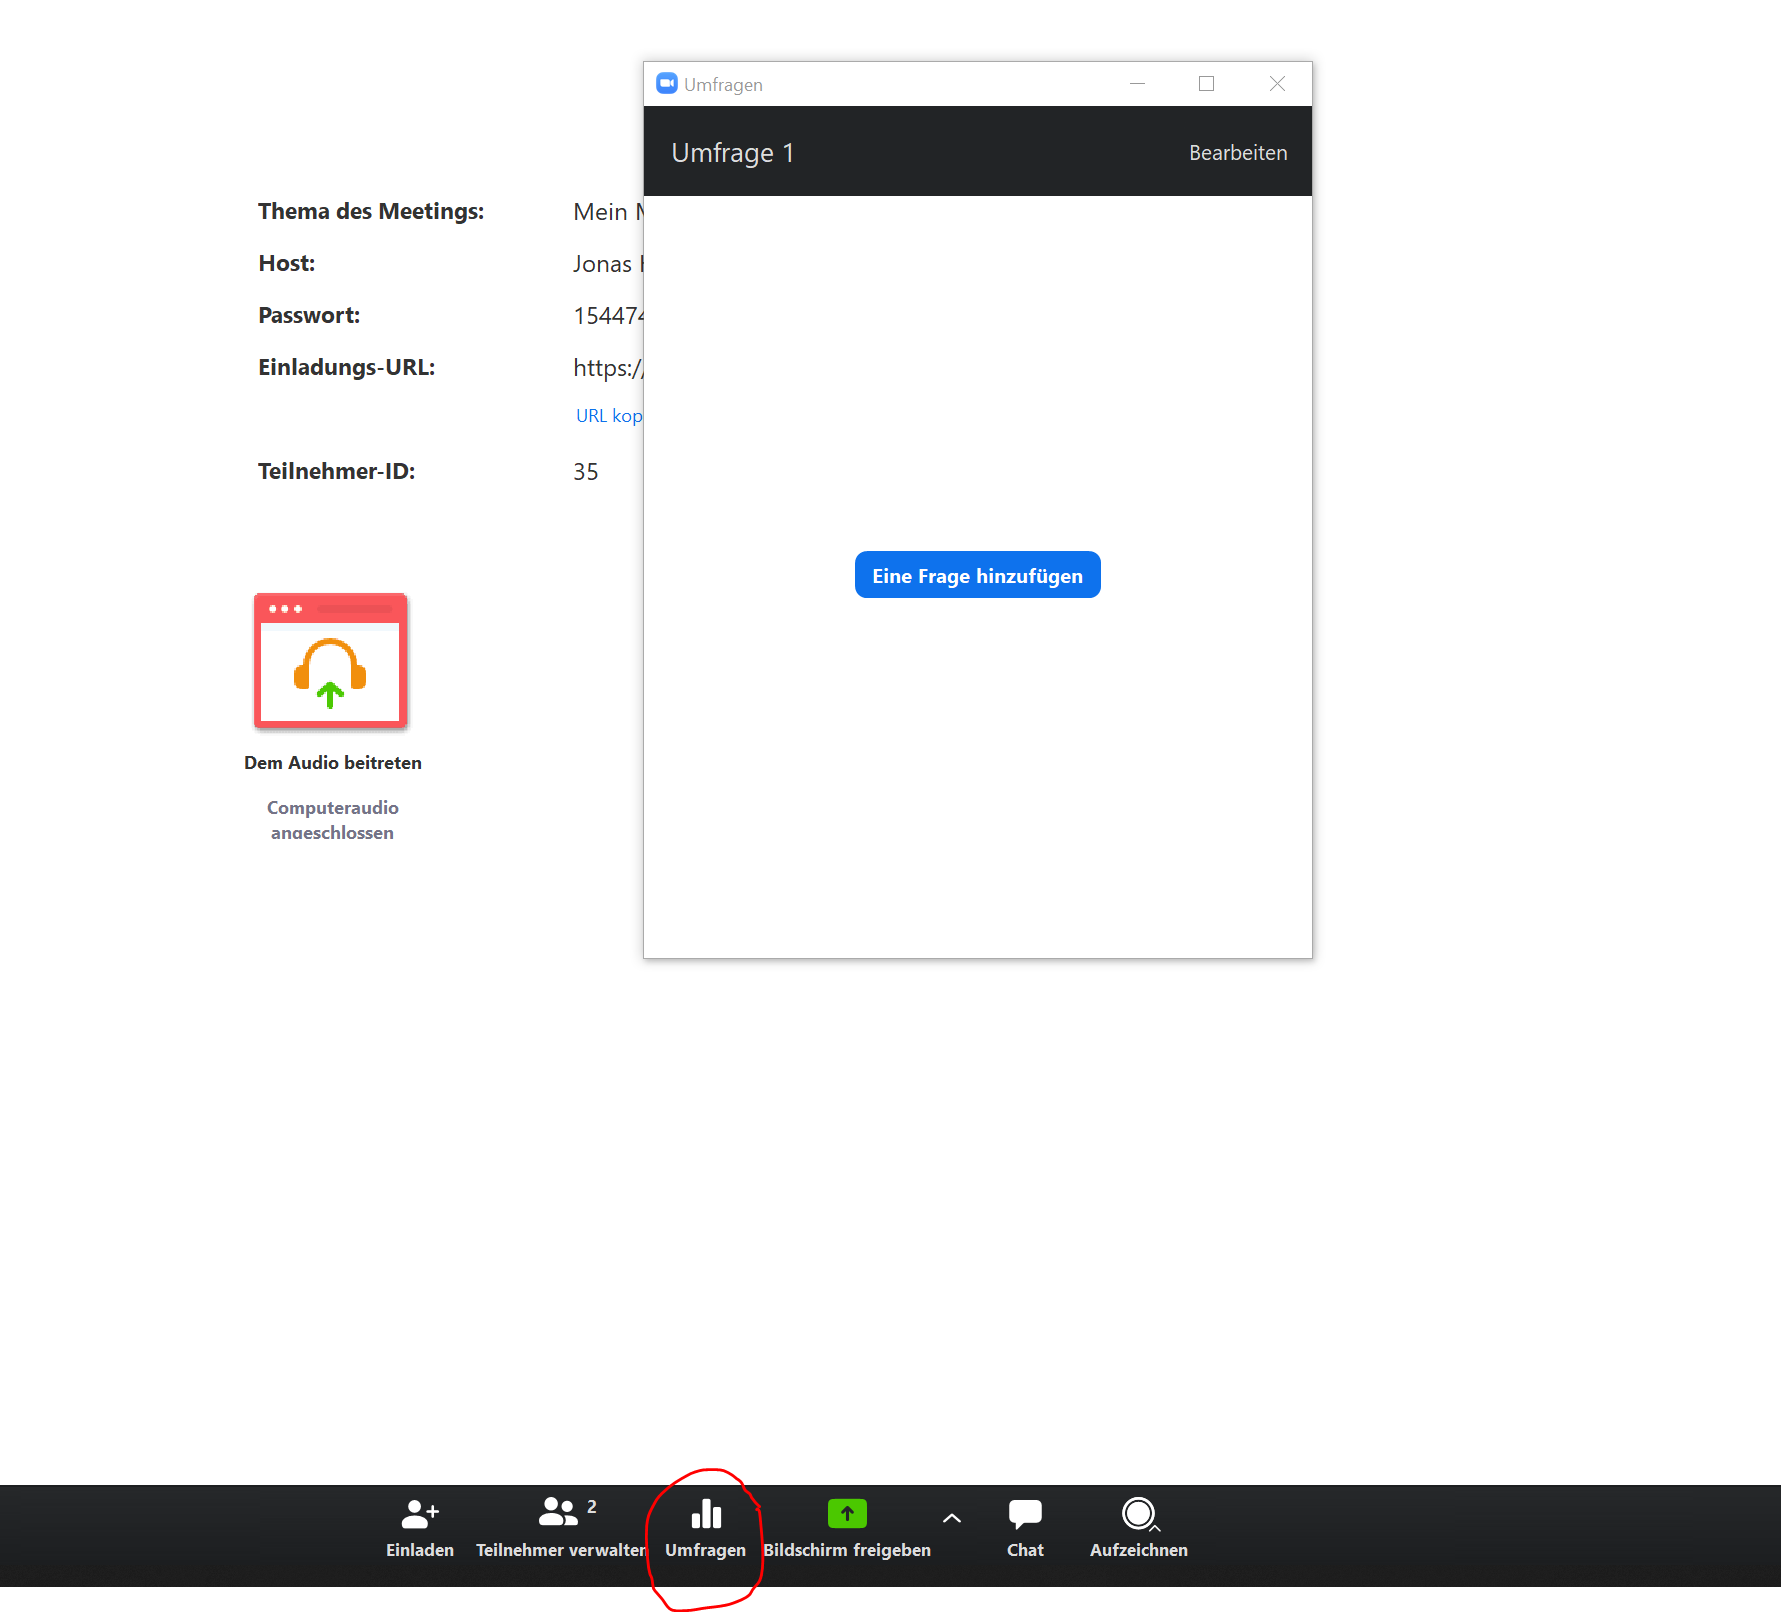
You can also create surveys in one session.
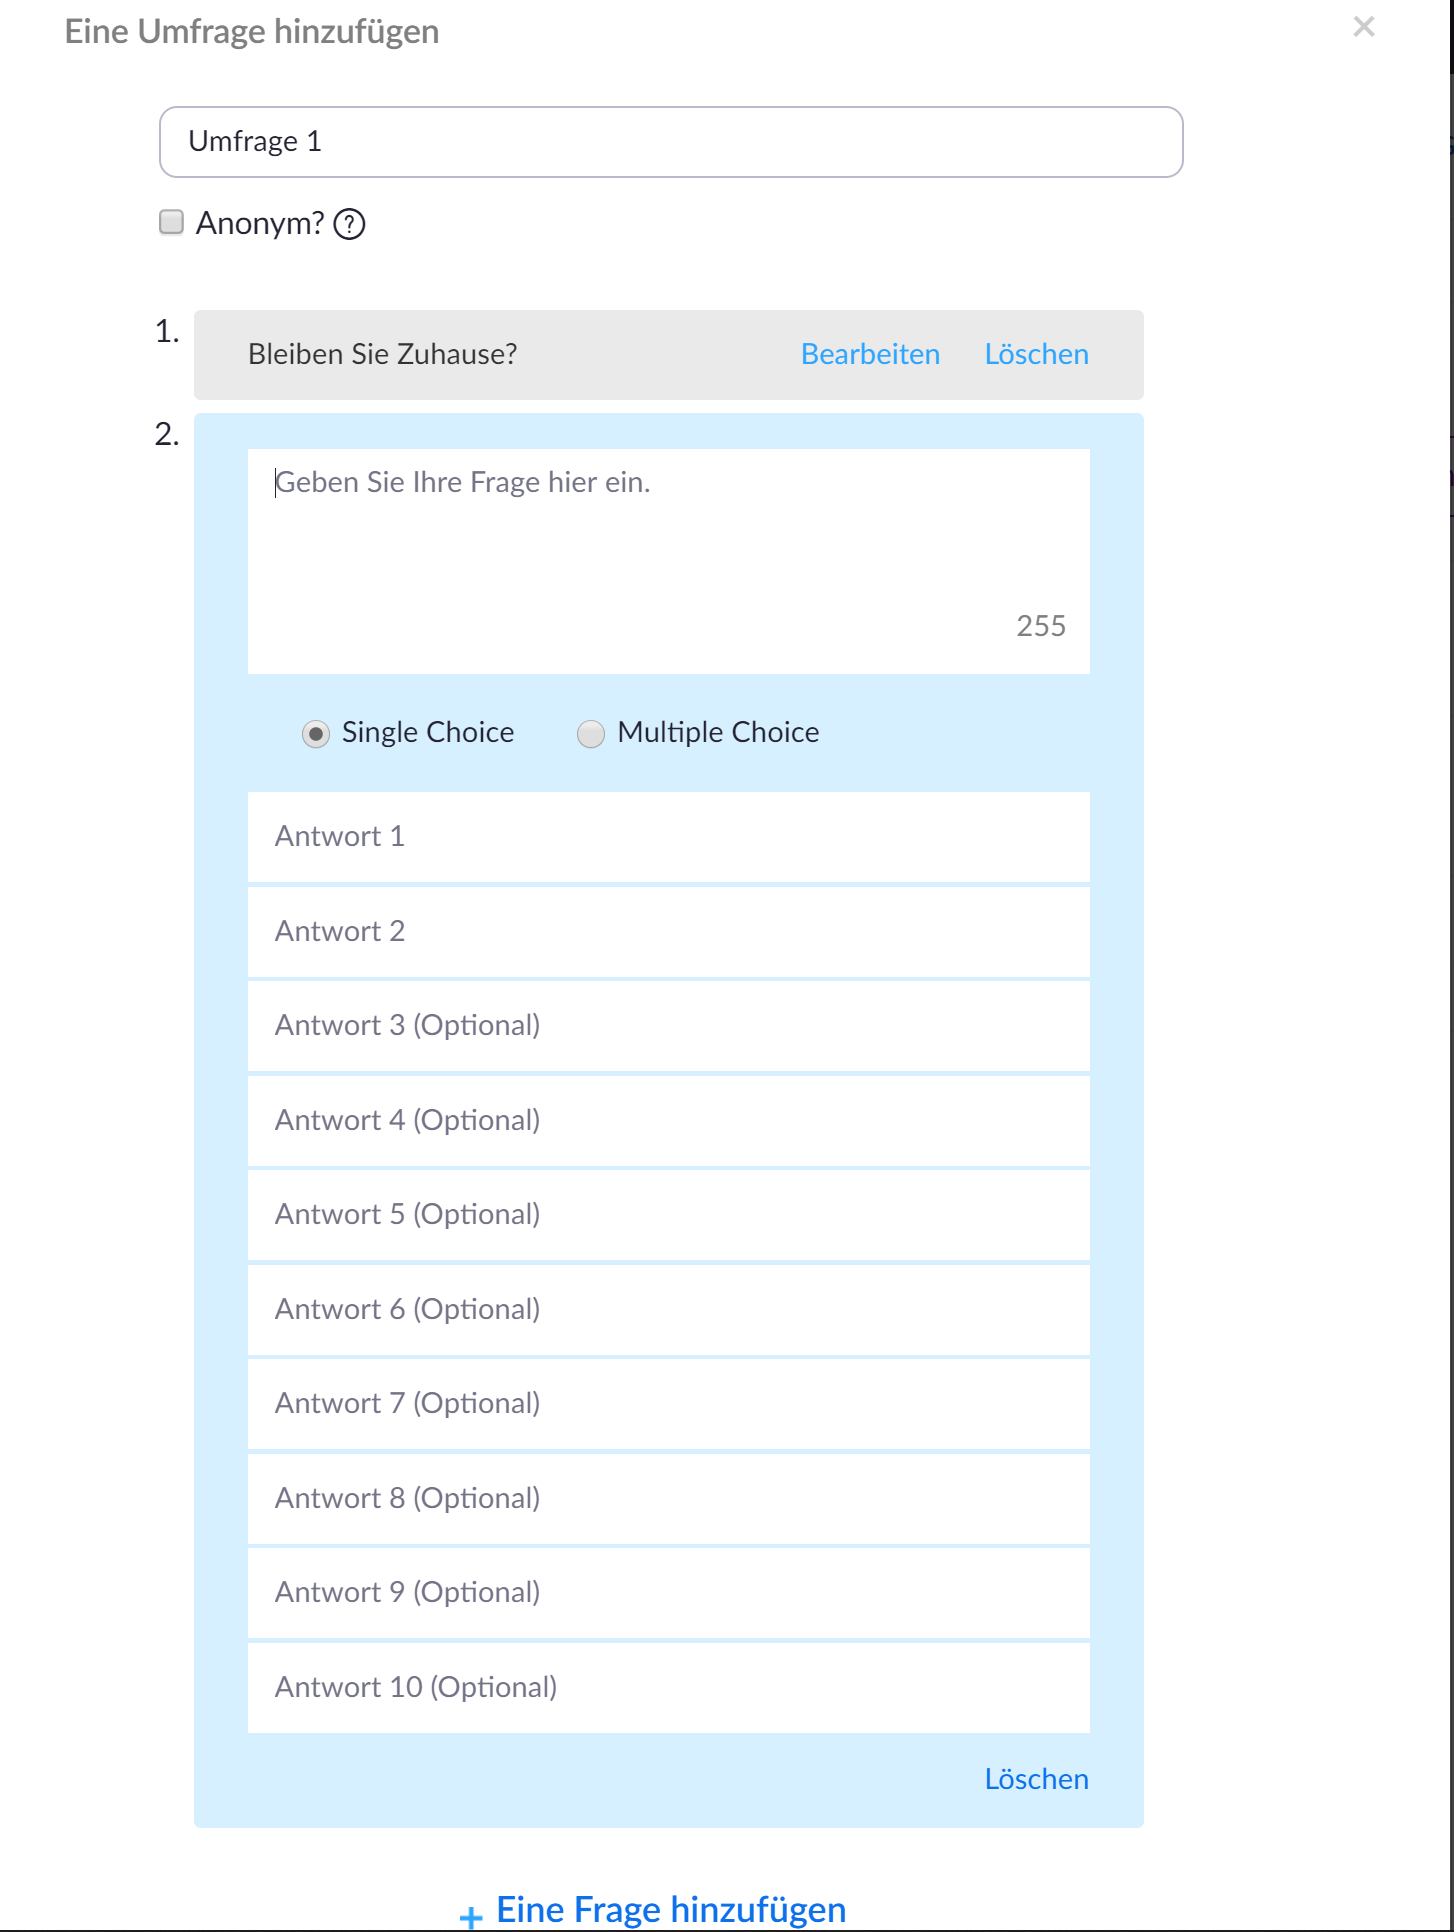
You will then be redirected to the Zoom website and can now create your questions here.
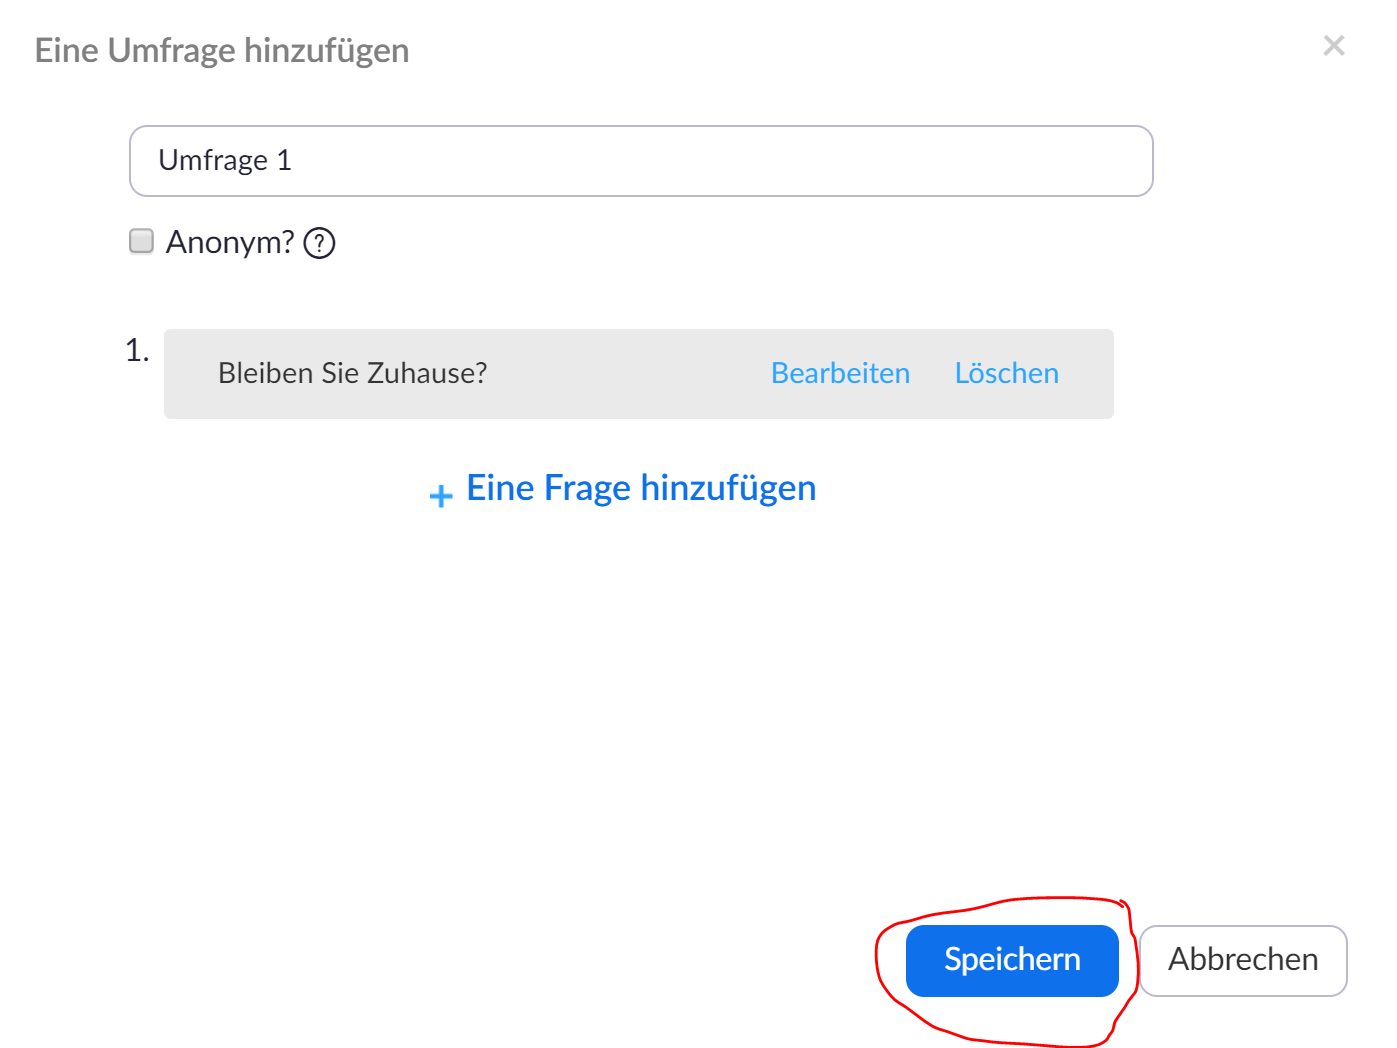
Be sure to save your survey as well.

In the Zoom app, click on Survey again and your created survey will appear. You can also do these steps before the meeting starts to save time.
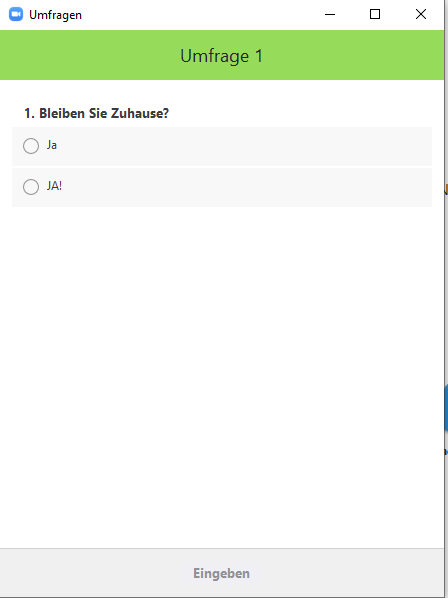
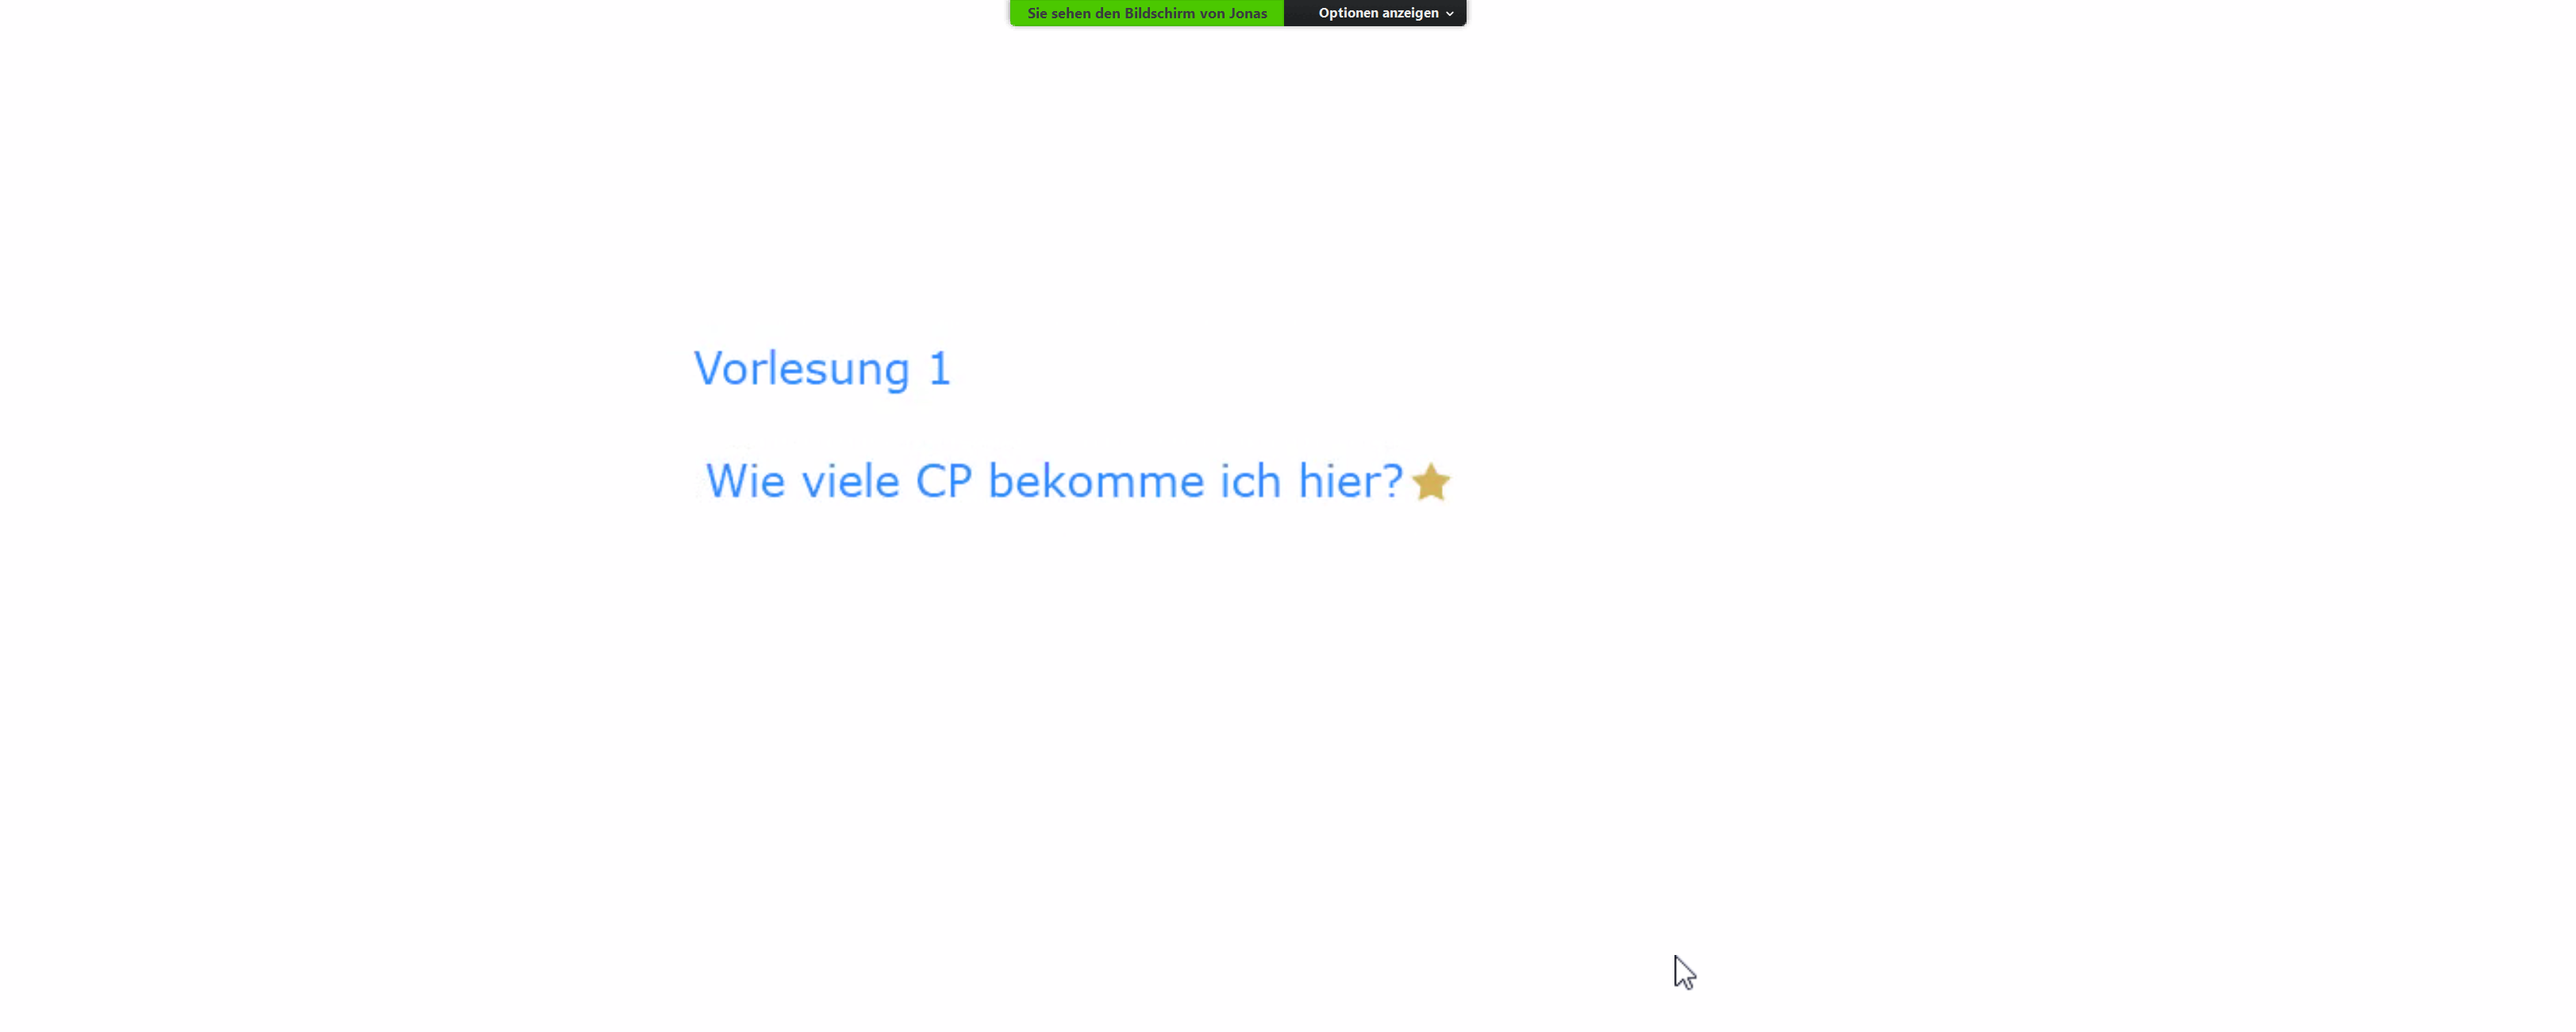
This is what the survey looks like from the participants' point of view.
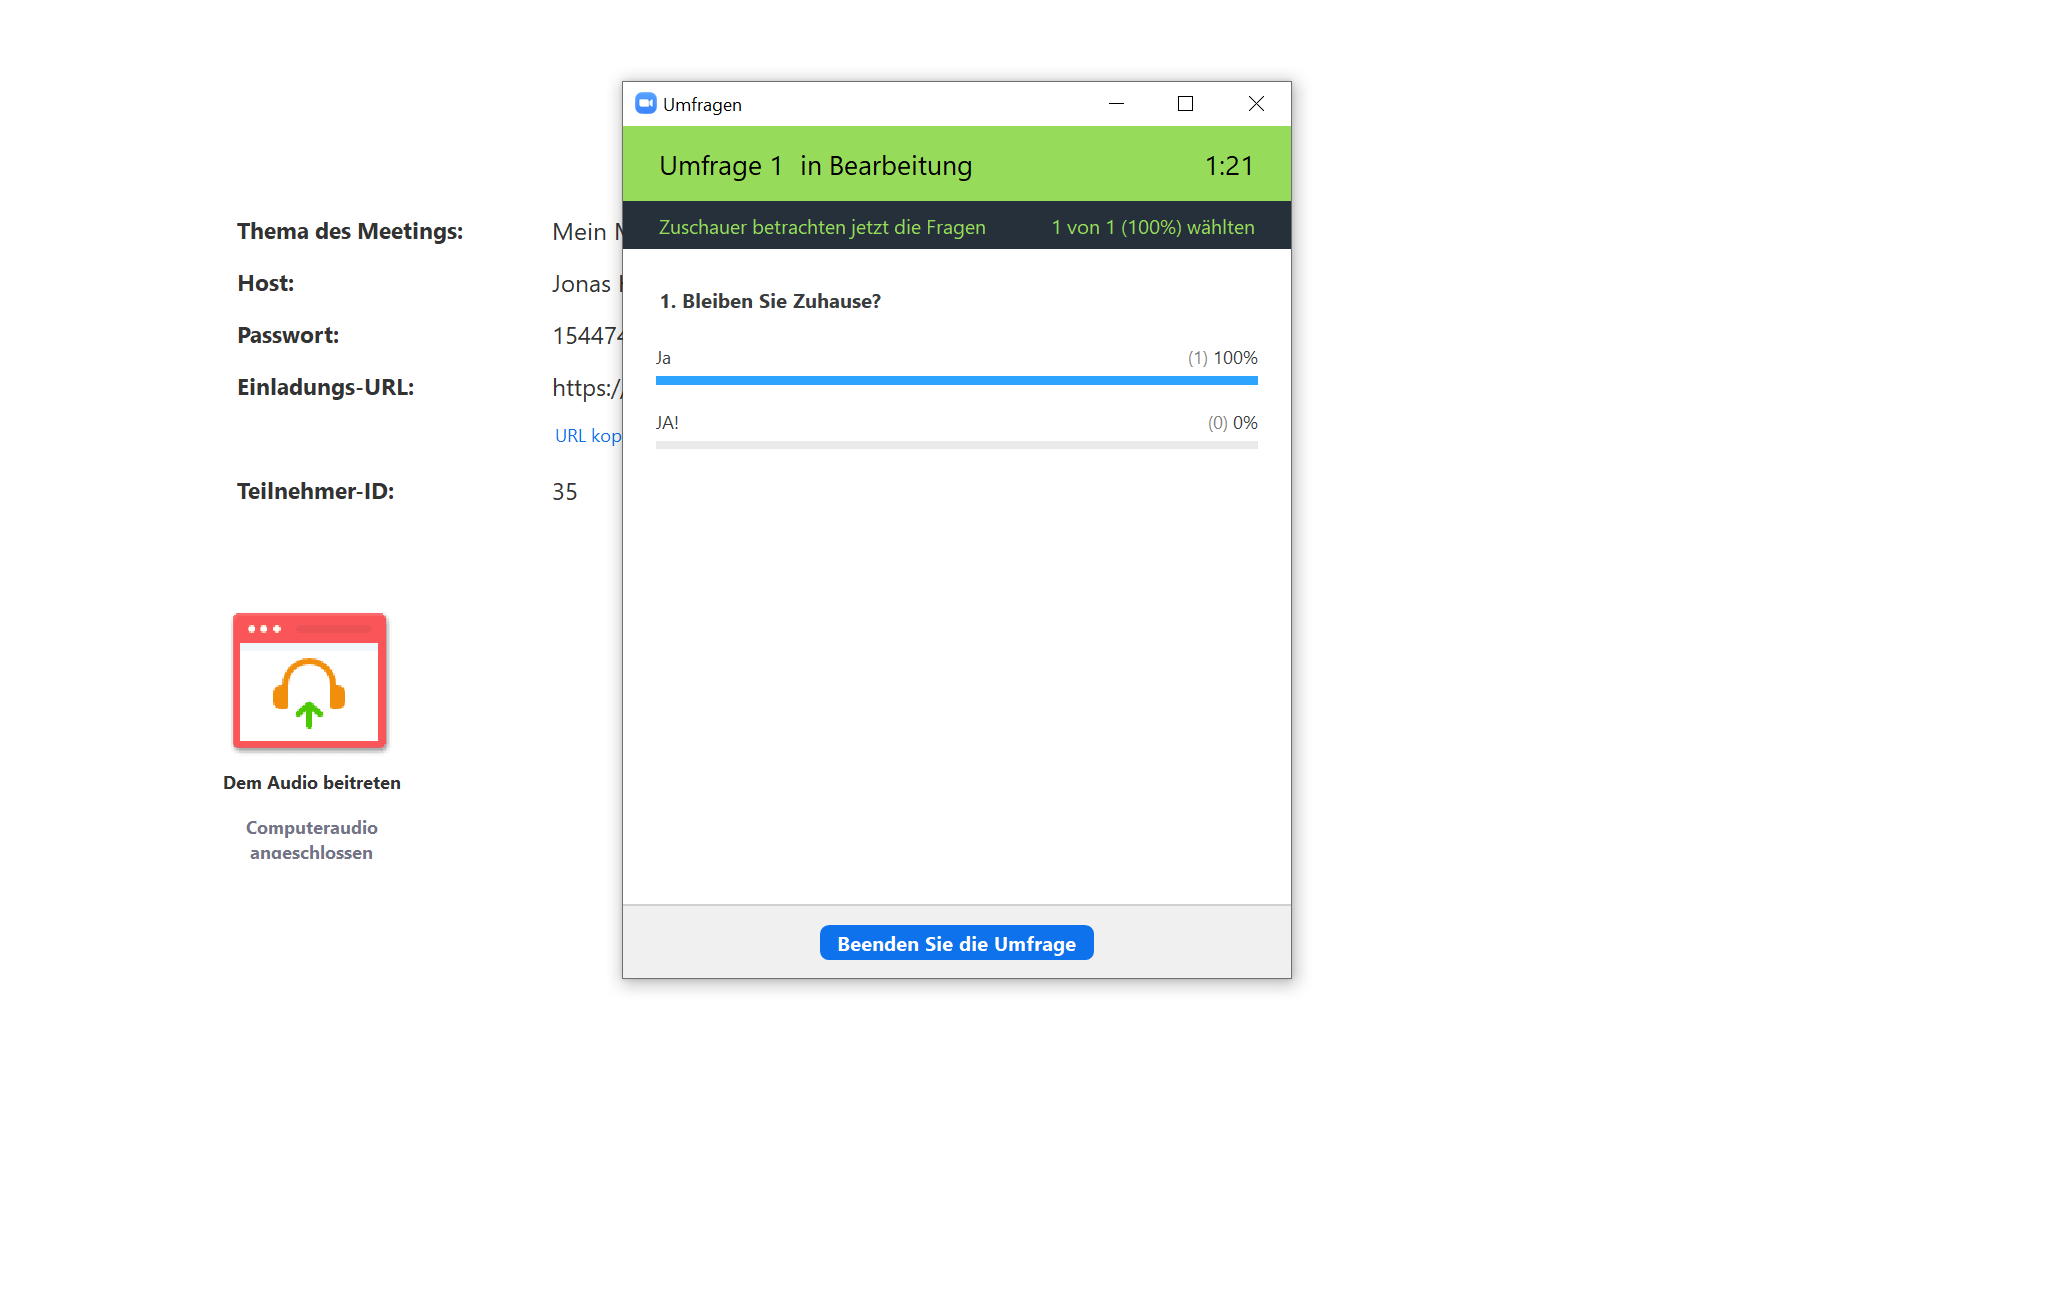
You can see how many participants have already taken part and end the survey manually.

As is so often the case, the red button ends the session.